
7 Android Studio Tips to Improve Productivity
Android Studio is a complex IDE with many features, shortcuts, and plugins.
As an experienced Android developer, I have some habits built around using the IDE after spending long years with it.
These are some of my favorite Android Studio tips that I believe improve my productivity and save me a lot of my valuable time.
1. Use a Physical Test Device Instead of an Emulator
This may sound a bit odd if you are a fan of using the emulator for your daily development.
After all these years of seeing the emulator getting in really good shape, I can understand you.
However, after switching back and forth between an emulator and a test device during my Android Development career, I finally found peace by always relying on my test device.
Test devices are fast, don’t bring any CPU or RAM load on your development machine, can be tested for real-life scenarios (like getting a call, putting the device to sleep, locking/unlocking) better, and allows you to touch and use what you just created.
If you haven’t had a physical test device as your programming companion, you should definitely give it a shot.
2. Use Wireless Debugging
There’s another tip for test devices: use the wireless debugging option!
Having a USB cable connected all the time to your computer is no bueno.
After Android 11, the wireless debugging and QR pairing are working like a breeze. I’ve been using it for almost a year now and I’m pretty happy with its performance and reliability.
Besides, I’m using a dock to keep my test device charged all the time so my workspace setup can stay sane and clean.
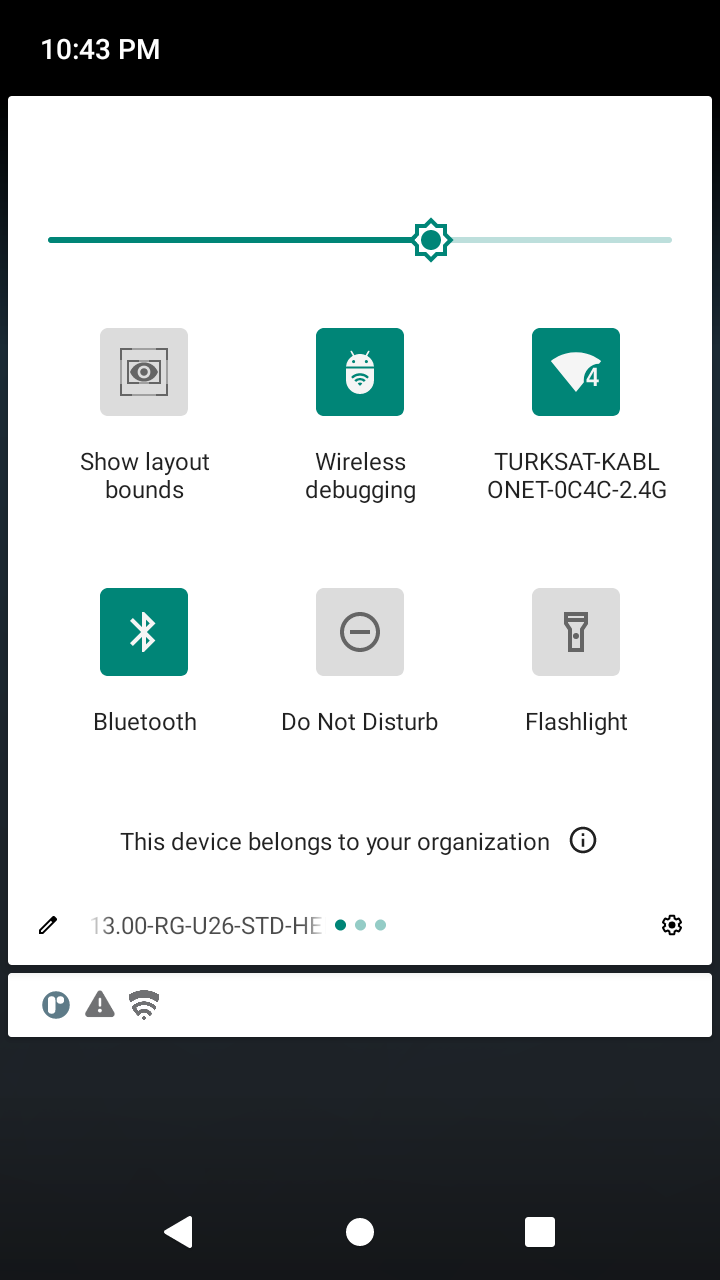
Bonus: You can use Developer Tiles to create a shortcut to enable wireless debugging right from your notification tray!
3. Navigate the Codebase Faster with Shortcuts
If you are maintaining a huge codebase you’ll know finding the correct place to write code is as time-consuming as writing the code itself.
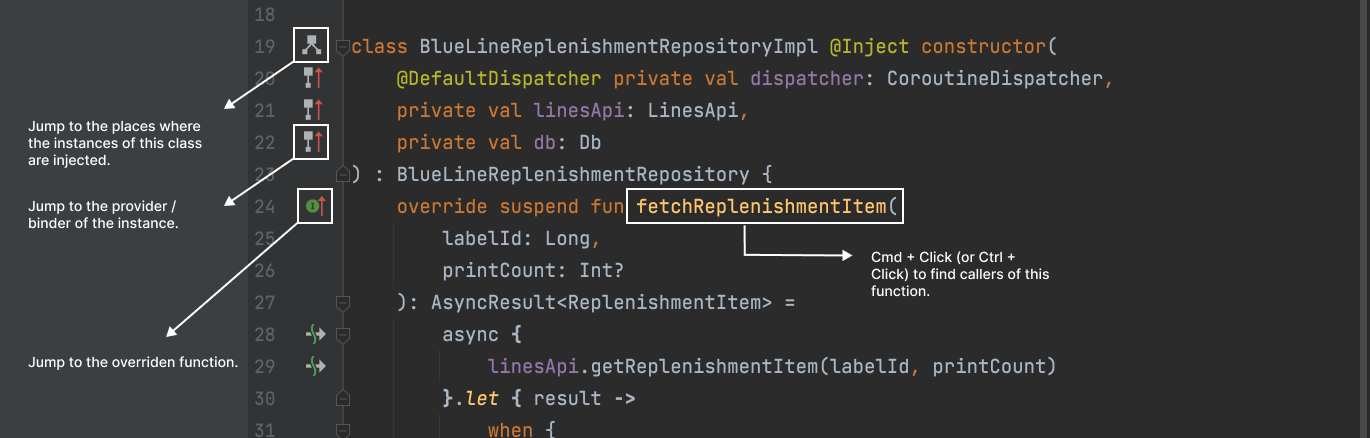
You may find yourself jumping between parent and child classes, abstract functions and their implementations, injected instances and their providers, etc.
Android Studio offers mini buttons to help you navigate between all these. If you haven’t started using these buttons they are time-savers!
Also, you can Cmd + Click (or Ctrl + Click) variable, function, and class declarations to find their usages or you can click the usages to jump to the declarations.
Another shortcut I use hundreds of times each day is Navigate > Back (Cmd + [) and Navigate > Forward (Cmd + ]) actions.
Using these actions Android Studio moves you through your caret history. If you jump from one file to another, Android Studio remembers it. If you have moved your caret to different positions within a file Android Studio remembers it.
So if you are working on multiple files, going back and forth several times will be a breeze with these.
There are other useful shortcuts to navigate, check out the “Navigating and searching within Studio” section of the official shortcuts page to learn more about them.
4. Deal with Imports on the Fly
When writing code or copying & pasting snippets, dealing with imports will always be a pain.
Luckily Android Studio can figure out the package you want to import in most cases and can do it for you.
You just need to enable the “Add unambiguous imports on the fly” preference under Preferences > Editor > General > Auto Import menu to let Android Studio add the correct imports for the code you are adding to the codebase.

From time to time, I tried to check the “Optimize imports on the fly” option too but that option causes trouble for certain scenarios when I try to bulk edit strings or do other advanced operations.
So, feel free to experiment with that option too if you’re feeling adventurous.
But remember, you can always optimize imports before committing your code with another setting, which is safer than using this option.
5. Master Effective Editor Usage
All operating systems have keyboard shortcuts to jump a word or a line. Combining it with a selection shortcut you can easily navigate through lines and modify them.
On macOS I use the following:
Option + Left / Right Arrow > Jump Left / Right Word by Word
Cmd + Left / Right Arrow > Jump to Start / End of the Line
Shift + Option + Left / Right Arrow > Jump Left / Right Word by Word and Select
Shift + Cmd + Left / Right Arrow > Jump to Start / End of the Line and Select
To up your game in effective editor usage, you can learn some additional shortcuts.
You can use Shift + Cmd + Up / Down Arrow to move a line, up and down in the file.
You can use Cmd + D to duplicate a line or Cmd + Backspace to remove it.
Another one I use frequently is Control + G (Add selection for next occurrence) shortcut. After selecting a word, you can keep hitting Control + G to keep adding more instances of the same text.

There are a lot of editor shortcuts to discover in Android Studio, take a look at the Preferences > Keymap > Editor Actions section to learn some keyboard skills.
As a bonus, check out the String Manipulation plugin and thank me later.
6. Utilize the Version Control Support of the IDE
I’m a big fan of using Git without any GUI and staying on the terminal. However, Android Studio has great tooling around Git so even I can’t resist using them.
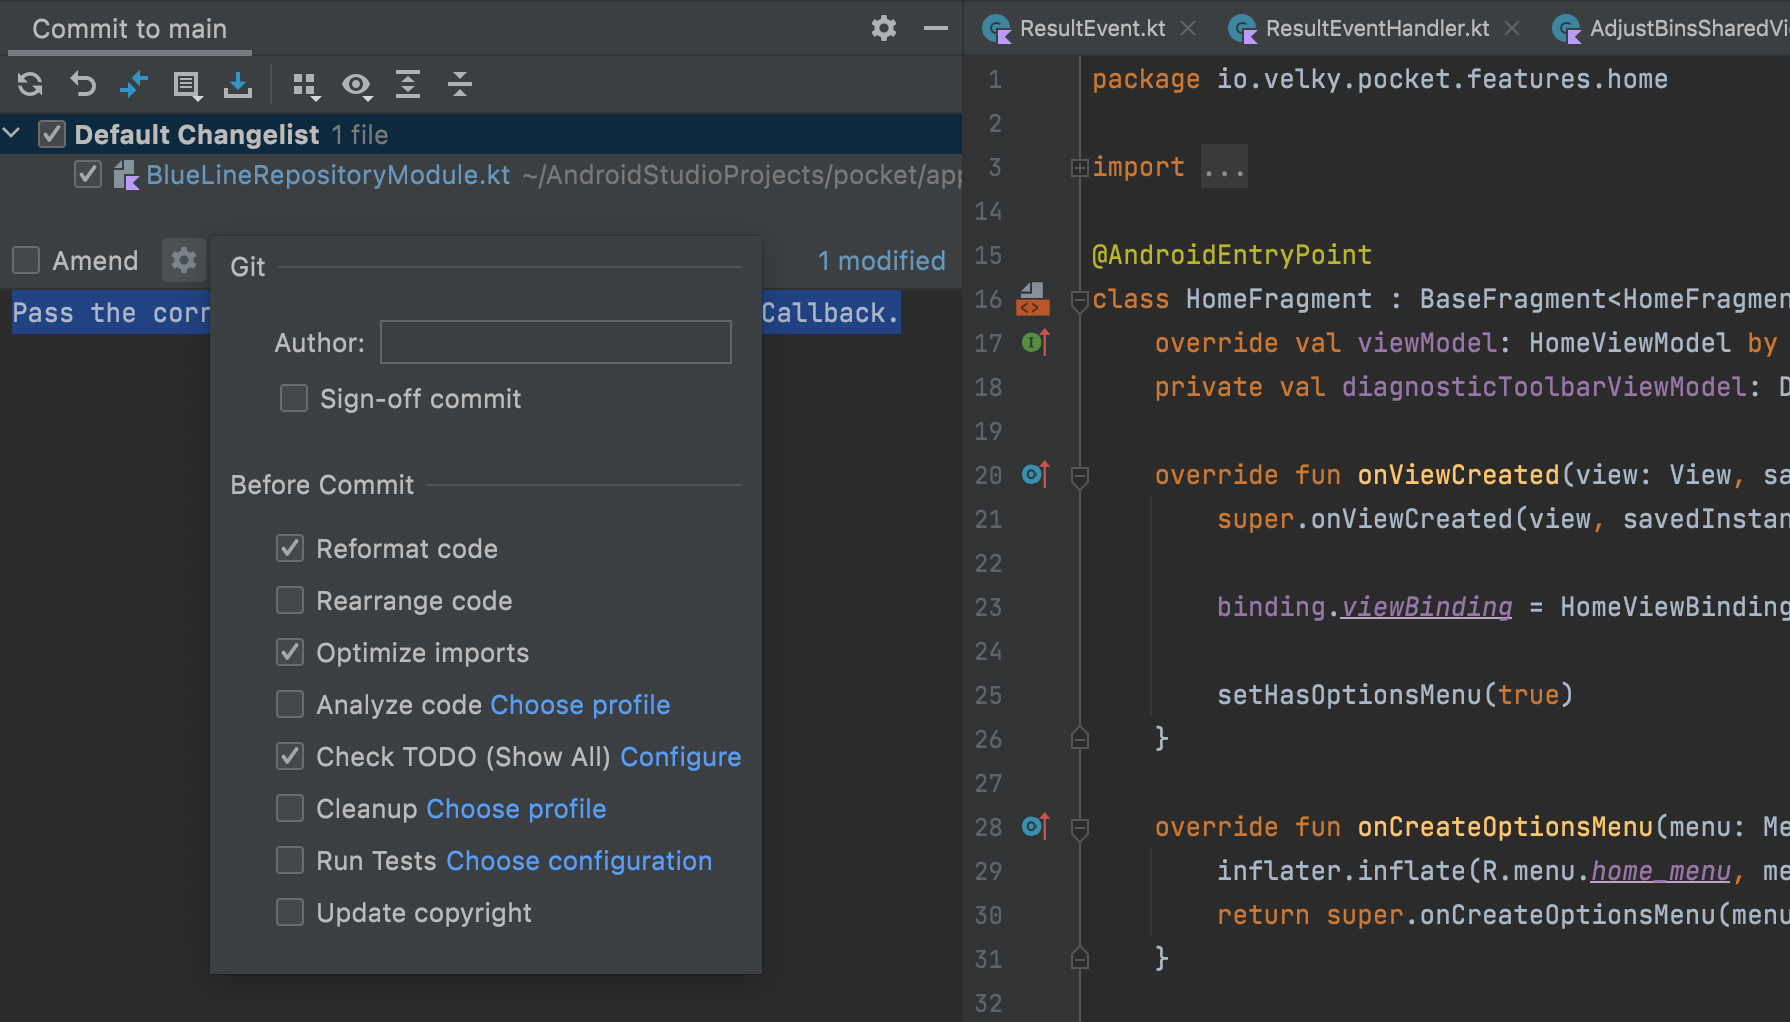
The commit dialog (Cmd + K) is a really convenient way to commit the files you wish with some powerful settings.
After you hit the gear icon in the commit dialog you can enable some actions for Android Studio to run before each commit.
My favorites are “Reformat code”, “Optimize imports” and “Check TODO”.
Other than the commit dialog I use the push dialog, interactive rebase dialog and conflict resolution screens to ease my daily git routine.
I totally recommend giving it a shot, even if you love using git on the CLI!
7. Create Live Templates
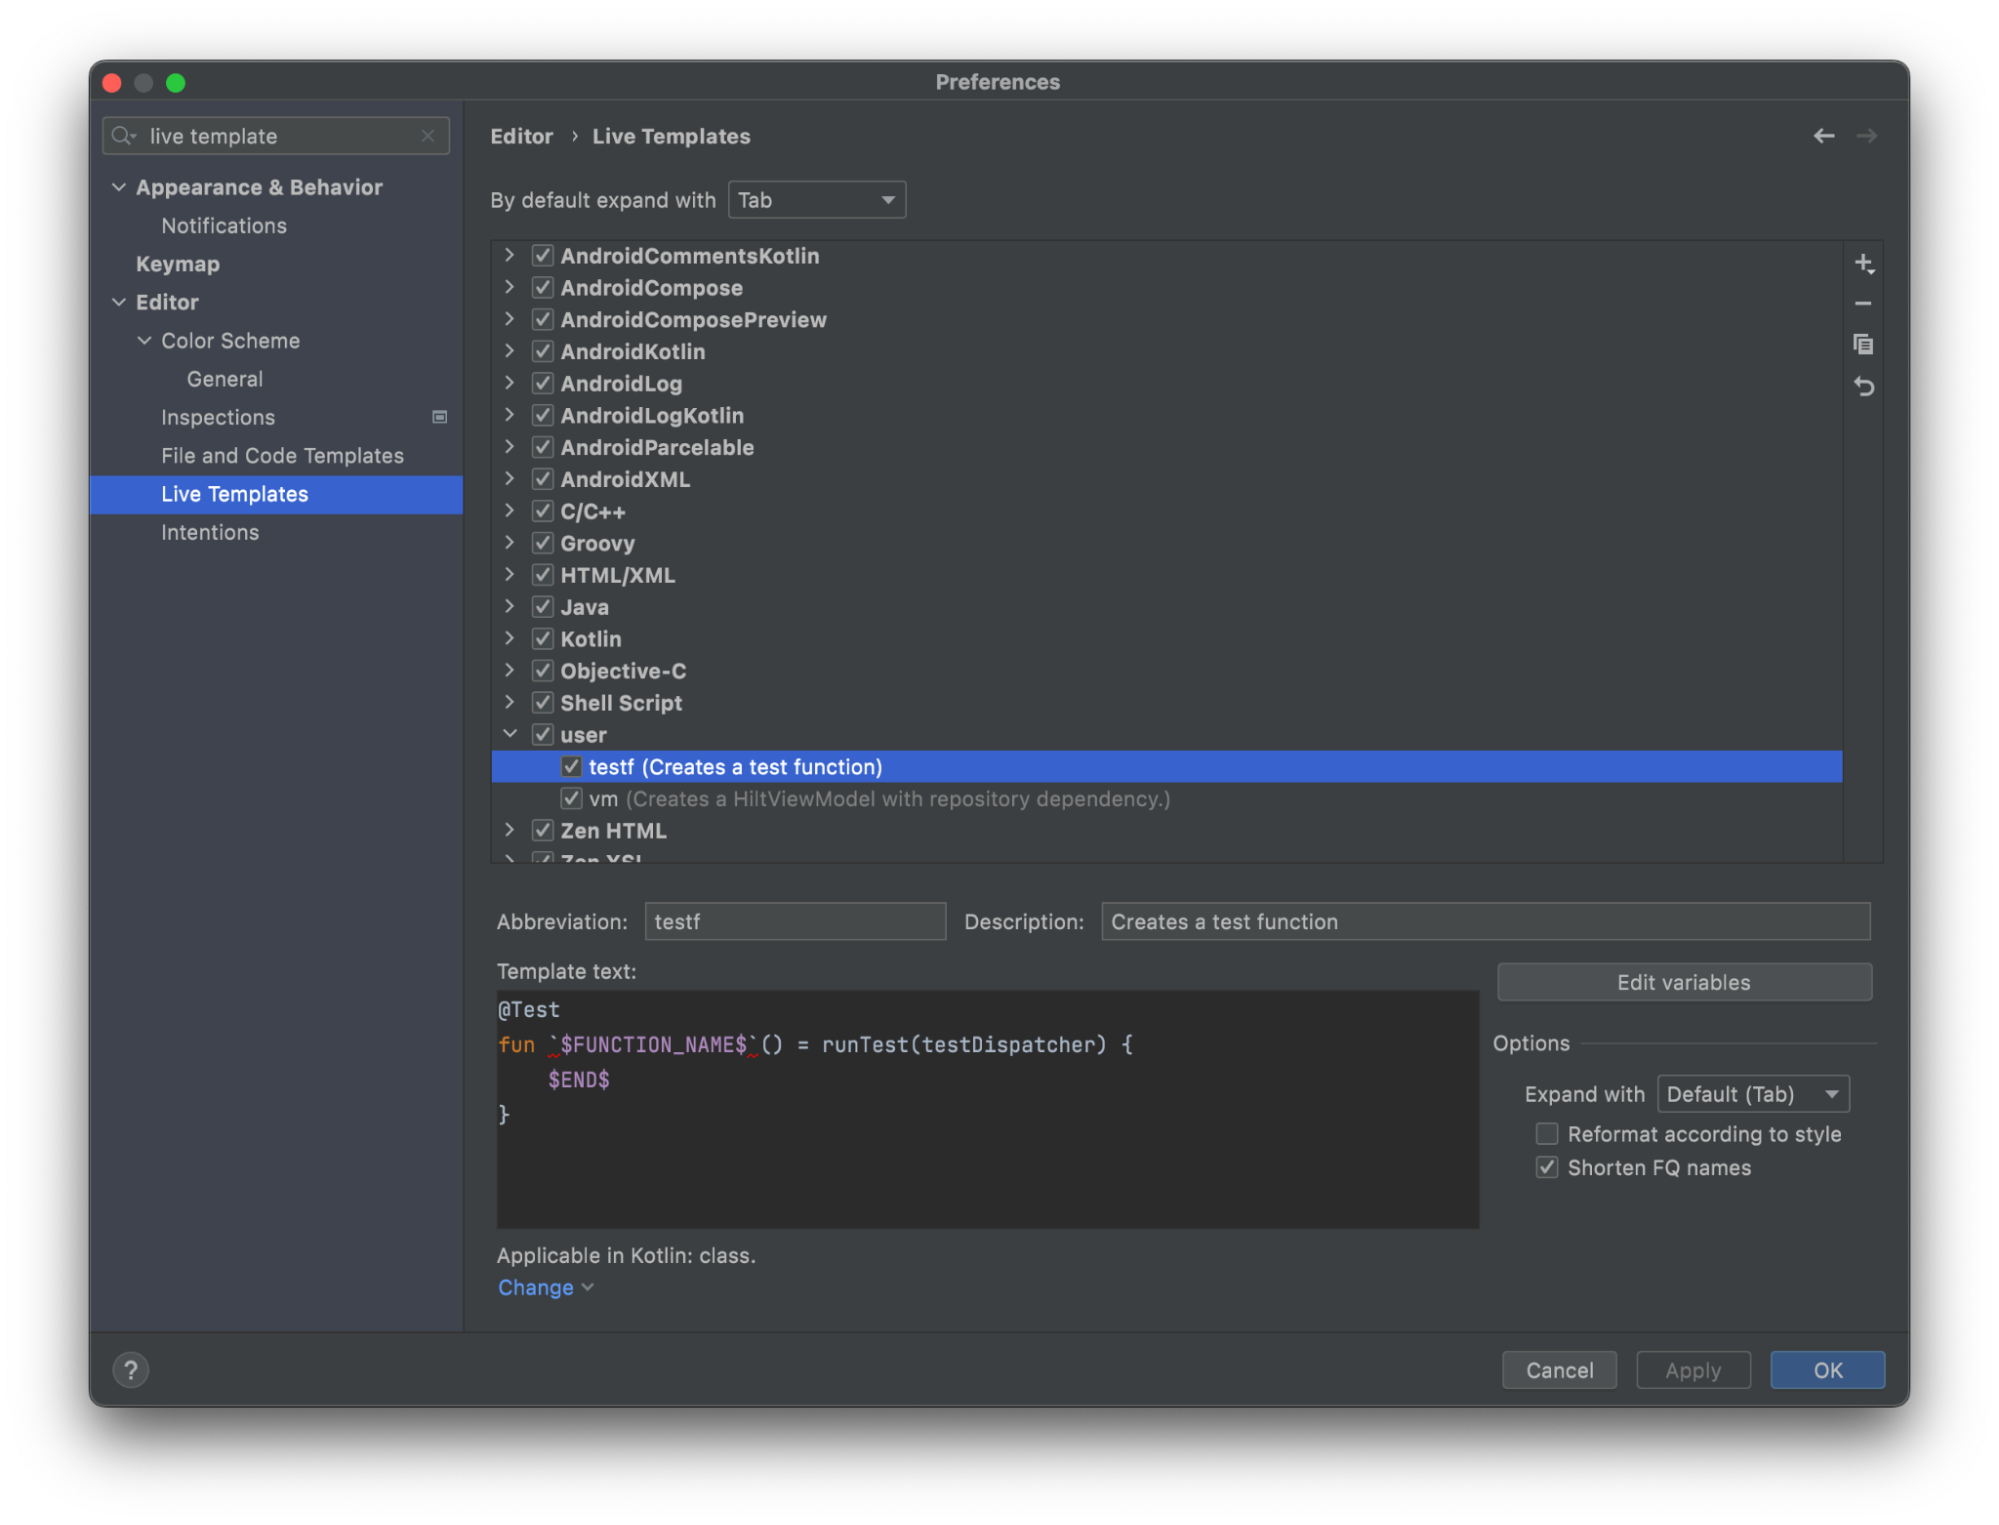
My last productivity tip is to create live templates for repetitive structures in your codebase.
Live templates allow placing boilerplate snippets with editable areas into which Android Studio will guide your caret.
For my last project, I have two templates: one for creating test functions and the other for creating ViewModels with preset configurations.
Don’t forget to see this article (which includes a video too) to see how to write code faster by utilizing live templates.
Thank you for reading and stay tuned for more Android Studio tips and productivity articles!

