
Jetpack Compose 101: The Basics
Jetpack Compose is the latest declarative UI development toolkit announced by Android. With compose, many screens can be developed safer and faster with lesser code. Here are the basics of Jetpack Compose:

Jetpack Compose Basics
Android’s UI Development Journey
Let’s start our article by looking at how creating layouts in Android has evolved over time:
1- XML
In the beginning of the Android development, developers where using xml files for ui development and had to use “findViewByID” for connecting ui items with application logic.(Button click listeners, setText for TextView and so on.)

Android XML Example

findViewById Usage
But it wasn’t enough. Developers came up with solutions to improve UI development process:
2- Butter Knife:
While developing UI with Butter Knife, annotate fields with `@BindView` and a view ID for Butter Knife to find and automatically cast the corresponding view in your layout:
class ExampleActivity extends Activity {
  @BindView(R.id.title) TextView title;
  @BindView(R.id.subtitle) TextView subtitle;
  @BindView(R.id.footer) TextView footer;

  @Override public void onCreate(Bundle savedInstanceState) {
    super.onCreate(savedInstanceState);
    setContentView(R.layout.simple_activity);
    ButterKnife.bind(this);
    // TODO Use fields...
  }
}
3- Kotlin Synthetic
With Kotlin Synhetic, we can directly access to xml item by it’s id:
class ExampleActivity extends Activity {

  @Override public void onCreate(Bundle savedInstanceState) {
    super.onCreate(savedInstanceState);
    setContentView(R.layout.simple_activity);
    itemText.text = "Hello Android!"
  }
}
4- Data Binding
With Data Binding you can write less boilerplate and repetitive code. It moves UI operations out of the activities and fragments to the XML layout. You assign the attribute to a variable, in the XML layout:
<layout xmlns:android="http://schemas.android.com/apk/res/android"
        xmlns:app="http://schemas.android.com/apk/res-auto">
    <data>
        <variable
            name="viewmodel"
            type="com.myapp.data.ViewModel" />
    </data>
    <LinearLayout
      <TextView
        android:layout_width="wrap_content"
        android:layout_height="wrap_content"
        android:text="@{viewmodel.userName}" />
    </LinearLayout>
</layout>
5- View Binding
View Binding is the last feature that made for ui development with xml. Once view binding is enabled in a module, it generates a *binding class* for each XML layout file present in that module. With these binding classes we get references to all views that are in xml:
private lateinit var binding: ResultProfileBinding

override fun onCreate(savedInstanceState: Bundle?) {
    super.onCreate(savedInstanceState)
    binding = ResultProfileBinding.inflate(layoutInflater)
    val view = binding.root
    setContentView(view)
    binding.itemText.text = "Hello Android!"
}
Here is a comparison table:
| Method | Readability | Compile Time Safety | Build Speed Impact |
|---|---|---|---|
| findViewById | False | False | True |
| Butter Knife | True | False | False |
| Kotlin Synthetic | True | False | True |
| Data Binding | True | True | False |
| View Binding | True | True | True |
Finally, to make development even faster and easier Jetpack Compose announced.
Note:
We are not suggesting that compose is better than xml in every aspect. For example when it comes to onWindowFocusChanged compose x2 times slower than xml.
Test results on xml vs compose rendering speed:
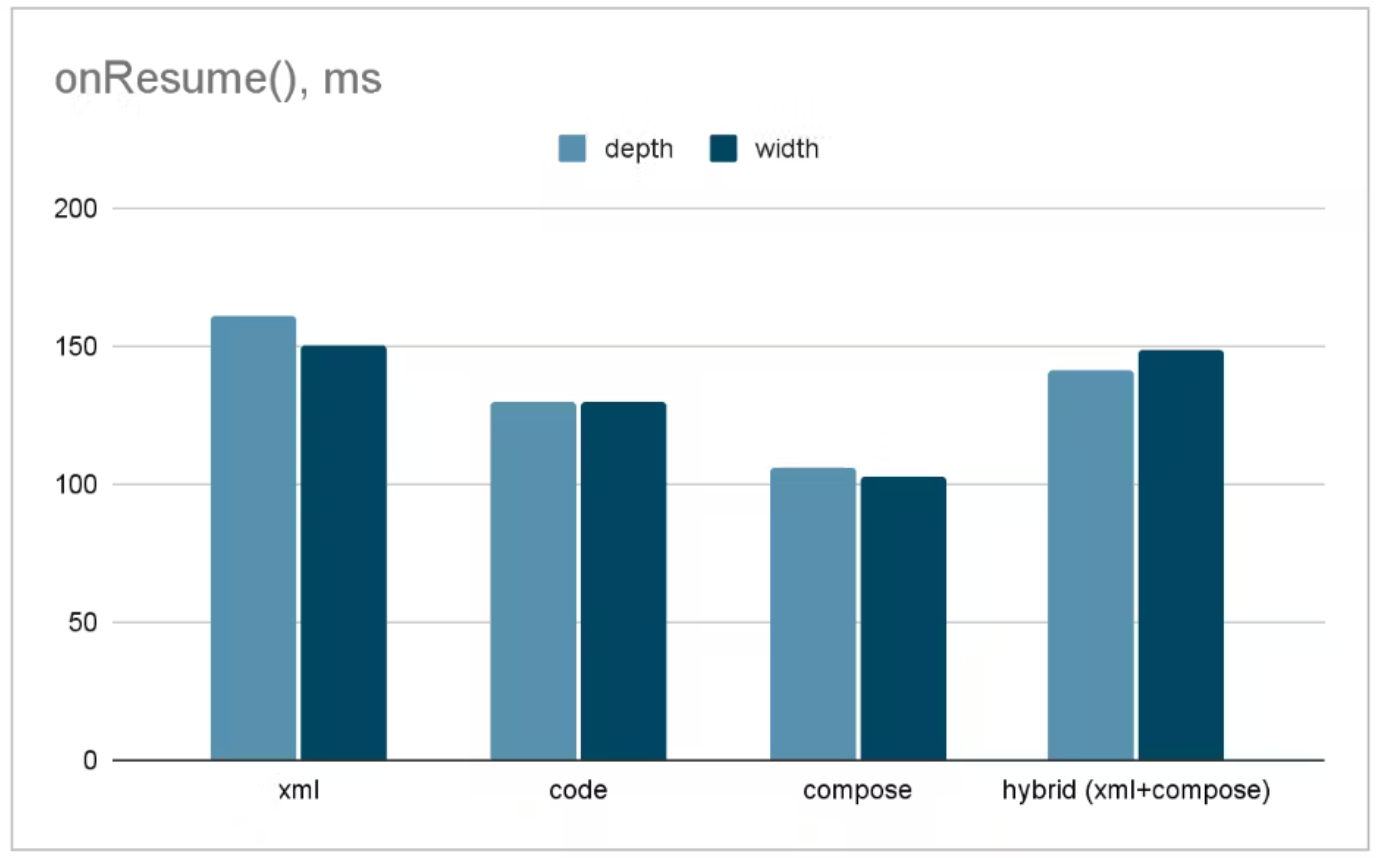
Xml vs Compose onResume render speed
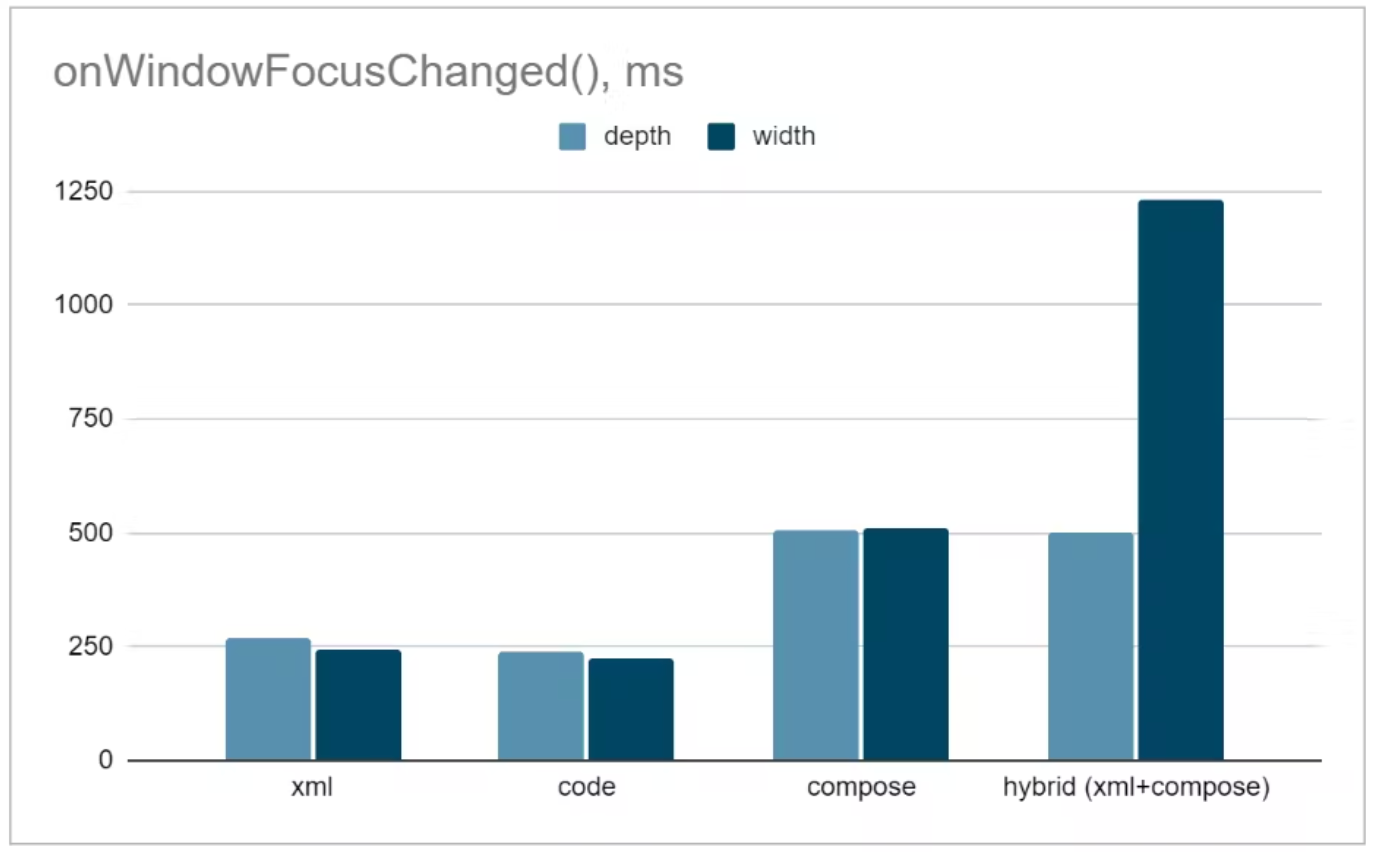
Xml vs Compose onWindowFocusChanged render speed
What is Jetpack Compose
Android introduced Jetpack Compose, a new declarative UI toolkit for building native user interfaces. It simplifies and accelerates UI development on Android since it requires less code, has great debugging tools and uses Kotlin APIs.
An XML interface can be rewritten with Compose with fewer lines of code:
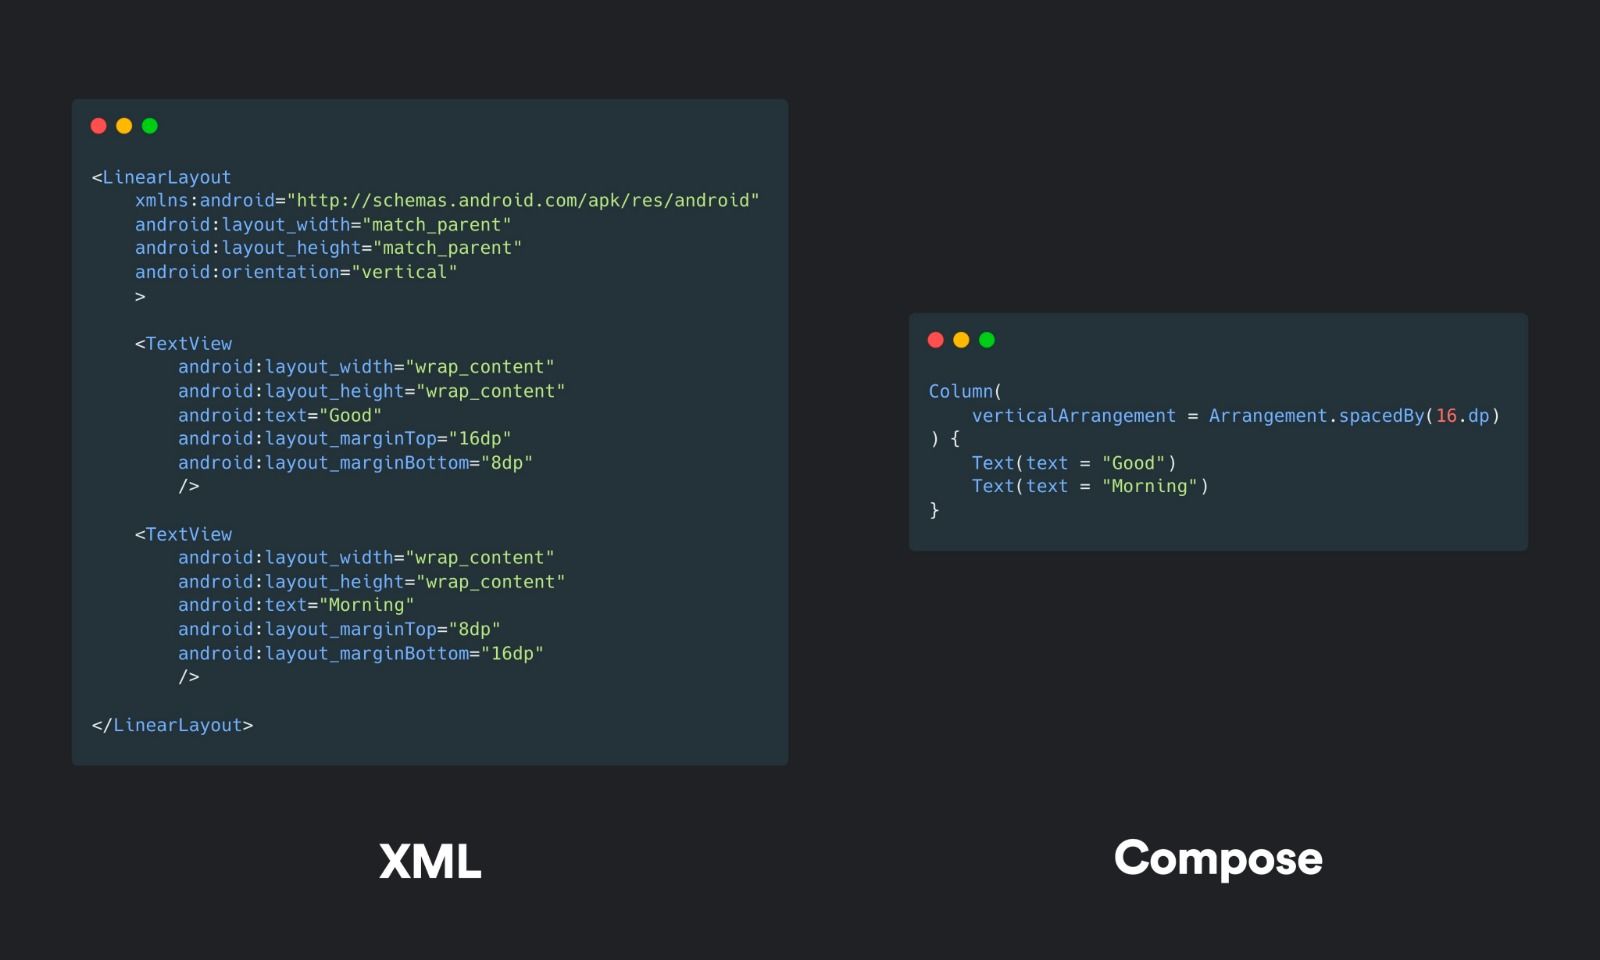
Xml vs Compose
If we managed to get your attention up to this point, let’s learn the basics of Compose.
Compose Basics
1- Composable Functions
With compose, we define our interfaces as functions. We’ll look at how our beloved “Hello Android” example is implemented with Compose.
First, we write our composable function(this step is not mandatory but getting a hang of it will make your development much easier):
@Composable // Annotation to say: "This is a composable function"
fun ShowText(name: String) {
    Text(text = "Hello $name!") //Composable Text function
}
Now let’s call this function in our MainActivity:
class MainActivity : ComponentActivity() {
    override fun onCreate(savedInstanceState: Bundle?) {
        super.onCreate(savedInstanceState)
        //Since Compose is not derived from Android views,
        //Instead of setContentView we use setContent
        setContent {
            ShowText("Android")
            //As a Different Approach:
            //Text(text = "Hello Android!")
        }
    }
}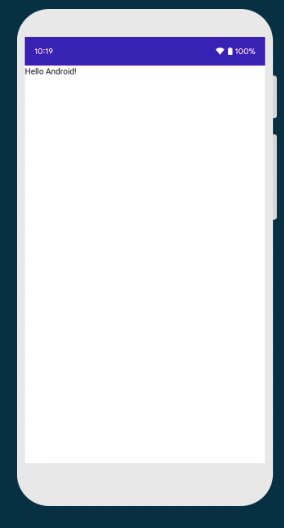
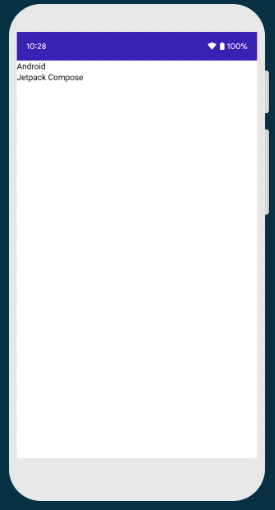
Run Output
And that’s it! Wedidn’t had to create any xml file, didn’t use any binding and printed “Hello Android” on the emulator with less than 10 lines of code.
2- Layouts
Layouts are one of the essential components of the UI development.
Let’s take a look at how Compose lays out UI elements:
Most basic compose layout components are Column, Row and Box. But what are these?
| Name of the Component | How it Works |
|---|---|
| Column | Inserts item from up to down |
| Row | Inserts item from left to right |
| Box | Inserts item on top of each other |
If we put two Text in a column:
@Composable
fun TwoText() {
    Column {
        Text(text = "Android")
        Text(text = "Jetpack Compose")
    }
}
Run Output
You might say: “It is easy to show two texts 😄 . Show me how RecyclerView works in Compose.” Here’s how:
3- RecyclerView in Compose
Forget adapters, this is how you define a recyclerview in Compose:
@Composable
fun ComposeRecyclerView(messages: List<String>) {
    LazyColumn {
        items(messages) { message ->
            Text(message)
        }
    }
}
LazyColumn will take care of everything for us 😁
4- Theming in Compose
Material Design is announced as a design language by Google in 2014. We won’t get into details of it in this article. However, we would like to show some of the changes between the Material Design versions:
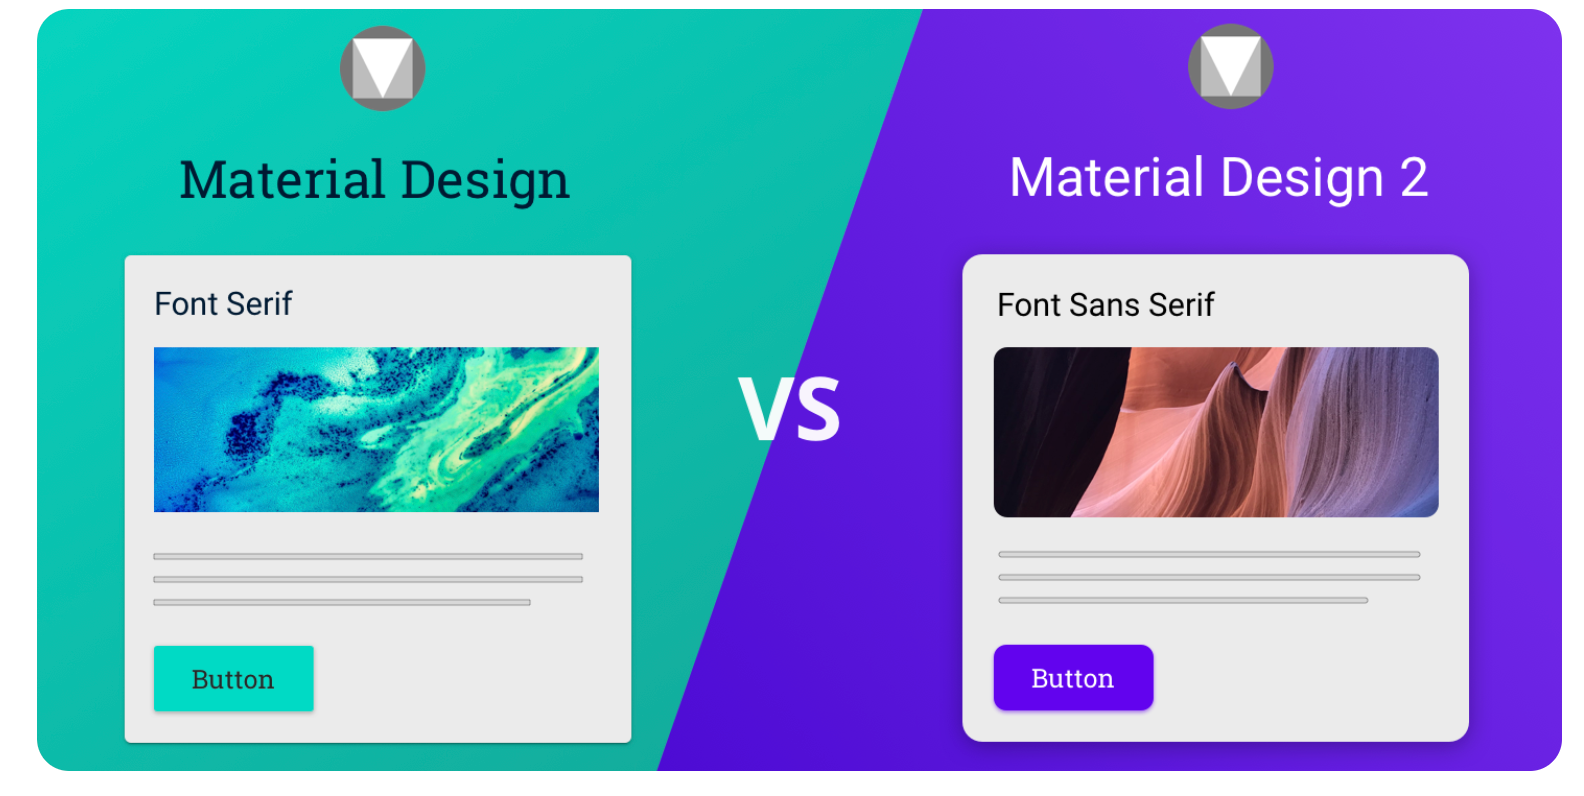
Material Design vs Material Design 2
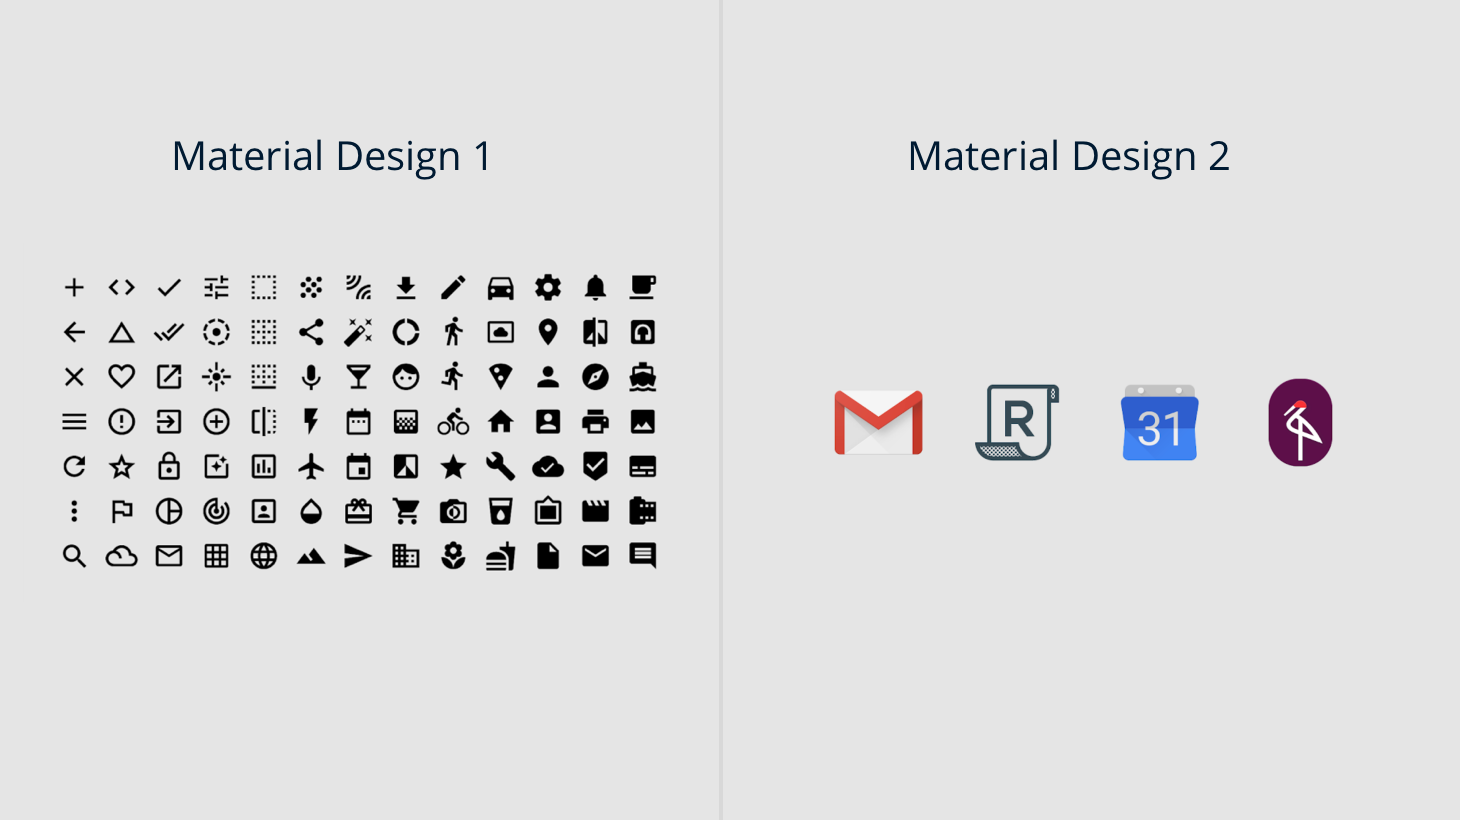
Icons for Material Design vs Material Design 2
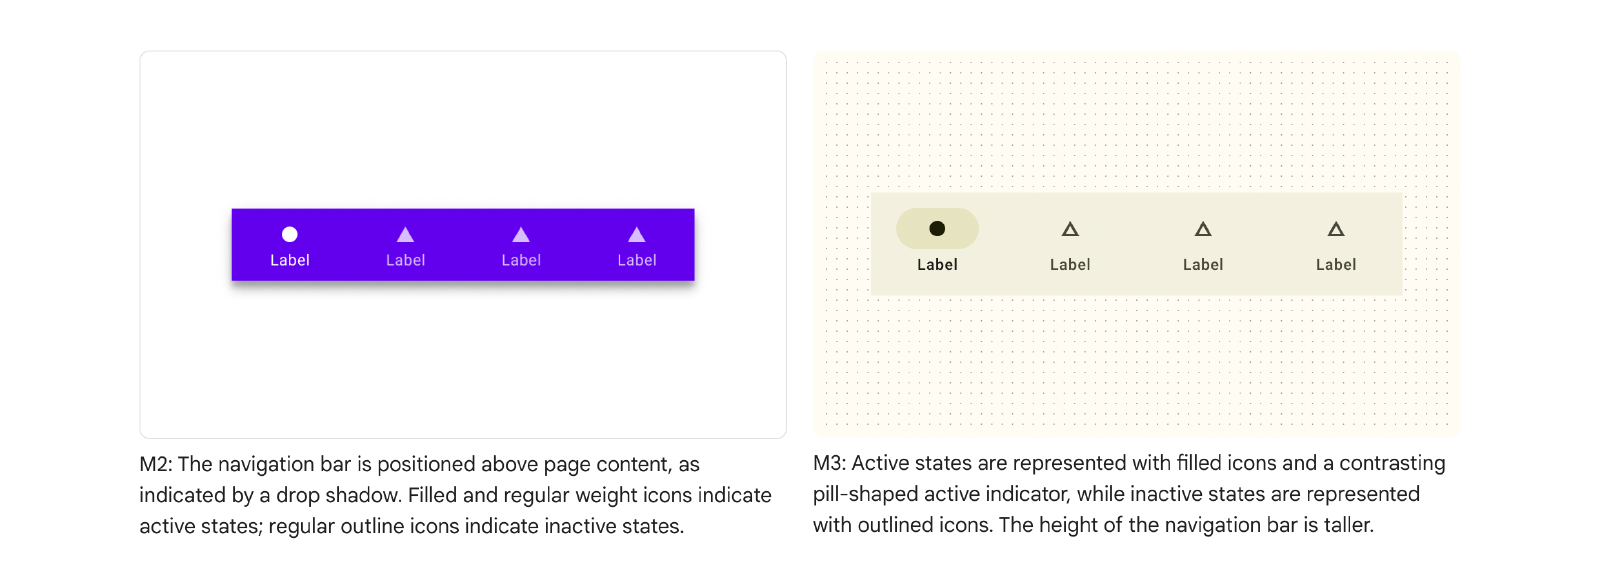
Navigation Bar for Material Design 2 vs Material Design 3

Buttons in Material Design 2 vs Material Design 3
With Material Design 3, an App’s theme can change dynamically according to the wallpaper colors or user’s requests:
Material demo animation
Cool isn’t it? 😄 Since Compose updates UI automatically, supporting this feature is much easier than supporting on xml structure.
Conclusion
In this article, we learned what is jetpack compose, why it is being seen as the future of native android UI development and its basics. If you want to dive deeper in Compose world, you can check out our upcoming Compose article series and Compose documentation:
the compose documentation page
.
What’s Next?
- There are pathways for compose that can help you practice development.
- Sample apps if you want to directly dive into code.
- Roadmap for compose to learn upcoming features.
- Compose testimonials from app developers.
- Compose news and videos to keep up with compose’s world.

