Posts

Automatic Code Signing for iOS

Automatic Code Signing for iOS

Code signing is a critical step in the iOS app development lifecycle, ensuring app security and compliance with Apple’s strict requirements. However, the process can be tedious and prone to errors, especially for teams juggling multiple projects. With Appcircle’s Automatic Code Signing feature, this challenge becomes a thing of the past.

Why Automatic Code Signing for iOS Matters

The traditional code signing process often presents the following challenges:
  1. Time-Consuming Configuration: Manually generating and managing certificates, provisioning profiles, and entitlements is both time-intensive and complex.
  2. Human Errors: Misconfigured certificates or missing profiles can lead to build failures, delaying releases.
  3. Scalability Issues: For teams managing multiple iOS projects, maintaining consistency across signing identities becomes a significant hurdle.
These obstacles slow down the development pipeline, adding unnecessary friction to an otherwise efficient CI/CD workflow.

How Appcircle Simplifies iOS Automatic Code Signing

Appcircle’s Automatic Code Signing feature is designed to eliminate the manual steps traditionally involved in iOS code signing. Here’s how it works:
  • Centralized Certificate Management: Store and manage your app code signing certificates securely within Appcircle.
  • Automatic Profile Matching: The platform intelligently matches provisioning profiles and certificates to your build configurations.
  • Error Reduction: Appcircle automatically handles signing configurations, reducing the risk of build errors caused by manual missteps.
  • Team Collaboration: Share signing identities across your team without compromising security or consistency.
For more details, explore the Signing Identities documentation.

Step-by-Step: Setting Up Automatic Code Signing with Appcircle

1. Upload Signing Identities

Start by uploading your Apple Certificates to the Signing Identities module in Appcircle. These assets are stored securely and made available across all your projects.

2. Configure Your Build Profile

Select your iOS project and link it to the appropriate signing identities. Appcircle’s intelligent matching ensures the correct certificates and profiles are used for every build.

3. Enable Automatic Signing

In your build workflow, activate the auto code sign option, choose the certificates you would like to sign the app with. Appcircle will take care of configuring the entitlements and signing processes dynamically.

4. Monitor and Debug

View detailed signing logs and reports directly within Appcircle. This transparency allows developers to troubleshoot any signing issues with ease.
For more information about Auto Code Signing, please visit our technical documentation.

Real-World Benefits of Appcircle’s Automatic Code Signing

  • Time Savings: Eliminate manual steps, allowing your team to focus on core development tasks.
  • Improved Security: Securely manage certificates and profiles with robust encryption.
  • Consistency: Ensure seamless signing processes across all team members and projects.
  • Scalability: Easily handle signing for multiple apps and configurations without additional overhead.

Integrating Code Signing into a Seamless CI/CD Workflow

Appcircle’s Automatic Code Signing integrates seamlessly into your CI/CD workflows. By automating builds, testing, and deployments, the platform provides end-to-end support for iOS app development. Whether you’re building for production or internal testing, Appcircle ensures that code signing is no longer a bottleneck. And if you’re comparing Xcode Cloud vs Appcircle, our detailed blog post on Xcode Cloud explains why Appcircle offers more flexibility and easier certificate management for teams of all sizes.

Conclusion

Managing iOS code signing has never been easier. With Appcircle’s Automatic Code Signing feature, you can streamline your workflows, reduce errors, and ensure compliance with Apple’s stringent guidelines. Empower your team to focus on delivering high-quality apps while Appcircle handles the complexities of code signing.
A Complete Guide to Flutter CI/CD for iOS, Android and Web

A Complete Guide to Flutter CI/CD for iOS, Android and Web

We all know it—setting up CI/CD for Flutter (or any mobile app) is probably one of the last things you want to think about, right up there with writing tests. But here’s the truth: embracing Flutter Continuous Integration and Delivery isn’t just a good idea—it’s essential. It streamlines your workflow, improves your apps, and, believe it or not, saves you more hassle than ignoring it ever could.
Skipping CI/CD may seem tempting, but it’ll cost you hundreds of hours chasing bugs, rolling back botched releases, and sitting through awkward meetings explaining to stakeholders why things went off the rails. And let’s face it, Flutter developers—you’re not exempt. In Flutter, CI/CD is just as critical as in any other framework. So, instead of dreading it, think of CI/CD as the safety net that keeps your workflow smooth and your apps reliable.

What Are the Benefits of Mobile CI/CD? What’s in It for a Developer?

Higher Productivity and Lower Costs

First and foremost, CI/CD solutions supercharge productivity through automation. Think of it like a manufacturing line: repetitive tasks like application builds are handled by “automated workers” (your CI/CD solution), freeing developers to focus on things that can’t be automated… like attending endless meetings.

Faster Release Cycles

Building an app takes time—so much time, in fact, that developers who rely on manual local builds often fall victim to “just one more change” syndrome. It goes like this: knowing how long a build takes, a developer decides to add “just one more line” before starting the build. Then they notice something else, or get another idea… and suddenly, that single change has turned into hours of untested code.
When it all goes sideways, you’ll be stuck sifting through hours of changes to figure out what went wrong. And let’s be honest, you don’t want to be doing that on a Friday. At 16:30. While your teammates are already halfway to happy hour.
With a mobile CI/CD solution like Appcircle, builds happen automatically in the cloud. You can confidently push even the smallest code changes, knowing the system will handle everything for you. This keeps your workflow fast and uninterrupted, letting you dive right into your next big idea—no waiting, no hassle.

Faster Feedback and Response

Shorter release cycles and smaller code changes mean faster feedback. When something goes wrong, it’s much easier to identify the specific change that caused the issue. This is especially critical for larger teams, where code conflicts are a common pain point.
With CI/CD, your code is continuously integrated without manual handoffs. This ensures all the pieces fit together seamlessly—or identifies any misfits before they become big problems.

Increased Coding Discipline

Every pull request triggers a build before merging, followed by automated unit testing and code reviews after every push. This process ensures that your code is thoroughly inspected long before release, leading to higher-quality apps and cleaner commits. In other words, CI/CD is the gentle nudge toward better habits that every developer secretly appreciates.

Early Warnings

In a CI/CD pipeline, every change is tested immediately as part of the workflow. This allows issues to be identified earlier—when they’re still small and manageable. Instead of digging through hundreds of lines of code, you’re pinpointing the problem in a fraction of the time.
And yes, this is especially useful on Friday afternoons.

Better Visibility

Mobile CI/CD brings transparency to your development process in two major ways. First, you’ll receive notifications whenever something goes wrong (or even right, though that can lead to notification fatigue). Second, the build logs provide detailed data you might not have had access to before. This makes it easier to troubleshoot, spot trends, and solve problems proactively—before they escalate.

Complexities of Delivery Are Handled for You

Mobile app delivery comes with a unique set of challenges, especially for multi-platform apps. From building and signing to distributing and installing, each platform (iOS, Android) has its own rules and requirements. With a robust CI/CD solution, all these complexities are automated, letting you spend more time coding and less time wrestling with configurations.

Left Icon

Ready to simplify your Flutter CI/CD pipeline?

Right Icon Meet Our Experts

Setting Up a Flutter CI/CD Pipeline with GitHub

GitHub provides an excellent foundation for hosting source code and automating workflows. With GitHub Actions, you can define custom workflows to automate various tasks like building, testing, and deploying Flutter apps.
Key Steps for CI/CD Setup:

1. Organize Your Repository:

  • Use a structured branching strategy, such as Git Flow, for better collaboration.
  • Store all necessary dependencies in the repository for reproducible builds.

2. Configure a Workflow File:

  • Define automation steps in a YAML file (flutter.yaml), specifying tasks like installing dependencies, running tests, and building artifacts.

3. Automate Testing and Builds:

  • Integrate testing frameworks for unit, widget, and integration tests.
  • Configure builds for iOS, Android, and web to generate IPA, APK, and web artifacts.

4. Streamline Deployments:

  • Use GitHub Actions to trigger automated deployments to app stores or internal testing platforms.
For more details, refer to Flutter documentation.

Simplifying Flutter CI/CD with Appcircle

Flutter ci cd

While GitHub Actions provides flexibility, setting up and maintaining workflows for mobile projects can become complex. This is where Appcircle excels, offering a mobile-first CI/CD platform designed specifically for streamlined workflows.
How Appcircle Enhances Your Workflow:

Step-by-Step Guide: Flutter CI/CD Workflow with Appcircle

1. Connect Your GitHub Repository
  • Link your repository to Appcircle securely using token-based authentication.
  • Select the branch (e.g., main or develop) to automate CI/CD tasks.
2. Set Up Your Workflow

Use Appcircle’s graphical interface to configure workflows tailored for Flutter:

  • Clone Repository: Fetch the latest code from GitHub.
  • Install Flutter SDK: Ensure compatibility with your project requirements.
  • Run Tests: Automate unit, widget, and integration testing.
  • Build Artifacts: Generate APK, IPA, and web builds with pre-configured steps.
3. Automate Signing and Security
  • Manage certificates and provisioning profiles using Appcircle Signing Identities.
  • Enable automatic code signing for both iOS and Android builds.
4. Streamline Testing
5. Automate App Distribution
6. Monitor and Manage Artifacts
  • Define retention policies to manage build artifacts effectively.
  • Automatically clean up outdated builds to optimize storage usage.

Conclusion

Flutter’s ability to deliver apps for iOS, Android, and web from a single codebase makes it a powerful framework. However, automating CI/CD pipelines is essential for maximizing efficiency and minimizing errors.
Appcircle provides a tailored solution for Flutter CI/CD, integrating seamlessly with GitHub to offer faster builds, better testing, and effortless app distribution. Whether you’re targeting app stores or internal platforms, Appcircle ensures a smooth CI/CD experience.

FAQs

1. What is the benefit of using CI/CD for Flutter projects?

The benefit of using CI/CD for Flutter projects is that it automates testing, building, and deployment across multiple platforms, streamlining workflows while improving code quality, accelerating release cycles, and reducing manual errors. This results in consistent and reliable app delivery for iOS, Android, and web, enabling faster feature releases and early bug detection. Additionally, CI/CD enhances team collaboration and minimizes production risks by ensuring reproducible builds and efficient deployment processes.


2. Why should I choose a mobile-first CI/CD platform over generic ones for Flutter projects?

Choosing a mobile-first CI/CD platform for Flutter projects ensures faster, more reliable builds, testing, and deployments, especially for iOS and Android. These platforms are built specifically for mobile, handling complexities like macOS build environments, code signing, app store submissions, and platform-specific dependencies. Unlike generic CI/CD tools, mobile-focused solutions offer prebuilt mobile-native integrations and up-to-date stack support. Platforms like Appcircle include built-in signing identity management, visual workflows, app distribution, and publishing modules, reducing DevOps overhead and accelerating release cycles.


3. How does Appcircle help with Flutter testing and deployment?

Appcircle lets you run unit, widget, and integration tests directly within your workflow. It supports Testing Distribution to share builds with QA teams, an Enterprise App Store for in-house app distribution, and Publish Automation for releasing apps to the App Store, Google Play, Huawei AppGallery, Microsoft Intune, and TestFlight. This all-in-one approach simplifies testing, distribution, and deployment, accelerating your Flutter app delivery.

Streamlining Xcode Project Management with Appcircle and Tuist Integration

Streamlining Xcode Project Management with Appcircle and Tuist Integration

Managing complex Xcode projects can be challenging as teams grow. Manual project setups and .xcodeproj conflicts often create bottlenecks, leading to inconsistencies and wasted time. Tuist, a command-line tool for Xcode project automation, simplifies this process by generating and managing project files through code. When combined with Appcircle’s CI/CD capabilities, teams can streamline their workflows, reducing conflicts and automating project setup. This article covers how Appcircle’s Tuist integration enables seamless project generation and management, keeping developers focused on code and collaboration rather than configuration.

What is Tuist?

Tuist automates Xcode project generation by defining configurations in a centralized Project.swift file. This approach replaces manual .xcodeproj files with an automated, scalable setup. Key features include:
  • Automated Project Structure: Consistent, reusable project files generated with each update.
  • Minimized Conflicts: Fewer merge conflicts through automated project configuration.
  • Support for Modular Projects: Simplifies handling of complex multi-module projects, regardless of size.
By integrating Tuist with Appcircle, iOS teams can automate both project generation and workflow processes in a single CI/CD environment, eliminating repetitive tasks. For more information about Tuist, please visit Tuist Documentation.

Leveraging Appcircle for Seamless Tuist Integration

With Appcircle, integrating Tuist is as simple as adding specific components to your workflow. Appcircle’s Tuist Install and Tuist Commands streamline the setup, build, and test phases, making Tuist even more powerful within an automated pipeline.

Tuist Install with Appcircle: Automating Project Setup

Appcircle’s Tuist Install component simplifies initial setup and version control for Tuist projects. Once your repository is cloned, Appcircle automatically runs tuist generate, creating .xcodeproj and .xcworkspace files on demand. Key benefits include:
  • Automated Project Generation: Quickly sets up project files with the tuist generate command.
  • Version Management: Supports specifying Tuist versions directly.
  • Integrated CI/CD Workflow: Works seamlessly with other Appcircle iOS build steps, enhancing the CI/CD pipeline.

Running Tuist Commands with Appcircle

Appcircle’s Tuist Commands component supports a range of Tuist CLI commands for flexible project management. Running commands like tuist build or tuist test within Appcircle can replace other build steps, optimizing the workflow. Benefits of using Tuist Commands in Appcircle include:
  • Streamlined Build and Test: Combines Tuist commands to reduce redundancies in testing and building phases.
  • Focused Workflow Control: Allows targeted execution of builds or tests on specific modules.
  • Reduced Complexity: Centralizes commands within Appcircle, making large projects easier to manage across teams.

Why Appcircle and Tuist Make a Powerful Combination

By combining Tuist’s automated project management with Appcircle’s powerful CI/CD platform, iOS teams gain the following advantages:
  • Improved Efficiency: Automated project generation and command execution minimize manual setup and reduce time spent on repetitive tasks.
  • Enhanced Collaboration: Consistent project files ensure all team members work from the same structure, improving alignment and productivity.
  • Optimized CI/CD: A seamless integration that reduces maintenance, keeps project dependencies up-to-date, and automates workflows.

Best Practices for Using Tuist with Appcircle

To get the most out of Appcircle’s Tuist integration, here are some recommended practices to enhance efficiency and keep workflows organized:
  • Configure Project Paths Properly: Use the $AC_TUIST_PATH variable to specify the project directory in Appcircle, keeping workflow paths consistent across team members.
  • Leverage Versioning in Tuist: Specify Tuist versions in Appcircle to prevent compatibility issues, especially when using multiple versions across projects or teams.

Real-World Advantages of Using Appcircle and Tuist Together

Integrating Tuist with Appcircle provides tangible benefits in real-world scenarios:
  • Faster Development Cycles: Automating project file generation and eliminating manual steps speeds up the setup process, freeing developers to focus on feature development.
  • Consistent Builds Across Teams: By automating project configuration, teams work from the same structure, reducing discrepancies and improving collaboration.
  • Scalable Project Management: Appcircle and Tuist provide the foundation for scalable iOS project management, making it easier to manage complex projects with multiple modules or targets.

Conclusion

Appcircle’s integration with Tuist offers iOS teams a powerful solution for simplifying project management, minimizing manual tasks, and enhancing collaboration. With automated project generation, streamlined command execution, and a cohesive CI/CD pipeline, teams can maintain a consistent project structure and focus on delivering quality code. Whether you’re a small team or managing a large, modular project, Appcircle, and Tuist provide the tools needed for efficient, conflict-free workflows.

WWDC 23: Keynote Live

WWDC 23: Keynote Live

Here it comes!

WWDC 23 is just started, and we are preparing the live updates for you!

You can enter the live Keynote here

10:00 am

It’s started!

apple tim cook

10:05 am

15-inch MacBook Air is introduced. It starts from $1299.

It’s been waiting for a long time. MacBook Air is one of the best products of Apple to join the MacOS environment. It is the thinnest 15-inch laptop with 11.5mm thin and only 3.3 pounds (1.53kg). It supports MagSafe and Touch ID. Moreover, it has up to 18 hours of battery life!

The 13-inch model starts from $1099.

m2 macbook air

10:10 am

M2 Ultra is introduced, and it is faster than before, as always.

Mac Studio comes with new M2 Max and Ultra chips, starting from $1999.

M2 Ultra and M2 Max are the new chips. M2 Ultra is the most powerful chip ever created for a personal computer, according to Apple.

Also according to the Apple, It can train ML workloads like large transformer models that the best GPU can’t process because they run out of memory.

22 streams of 8K ProRes video can play at the same time. Yes, that is a lot!

m2 ultra chip details

mac studio details

10:15 am

Mac Pro comes with M2 Ultra. It is starting $6999.

mac pro details

10:20 am

iOS 17 comes with features of personalized call photos and memojis, live voicemail, catch-up, inline location, new sticker experience.

Personalized call photos will be shown during the call.

Live voicemail helps old-school people to read voicemail messages as text.

Audio messages are transcribed.

With new sticker experience, you can now make live, animating stickers from live photos. They can also work with third-party apps.

ios 17 details

10:25 am

Use AirDrop to swap your number with someone new. “NameDrop”. If you bring phones close together, you share your contact poster and you can chose what number and email addresses you share.

You can close your iPhone to another one to start transferring also, like AirDrop.

airdrop

10:30 am

Journal app will be alive for us. It helps to write down daily adventures.

It stores your data such as people, places, activity, music, photos and more to provide an excellent way for practising gratitude.

ios journal app

10:35 am

StandBy is the form that makes iPhone like a smart alarm.

it is enabled when the iPhone is sideways, designed for a MagSafe stand. You can see the time, calendar, alarm, and more. It also supports smart stacks and other features like live activities.

ios standby feature

10:40 am

The new version iPadOS 17 comes with the features mainly released for iOS 16.

iPadOS 17 will include the almost the same features in iOS 17.

You can interact with widgets more by customizing home screen. Also, redesign the lock screen with a beautiful earth animation.

Health app coming to iPadOS.

Handling PDFs are easy now! Preview, sign, and edit PDFs.

ipados details

10:45 am

Now, macOS Sonoma.

Apple TV screensavers can be used in Sonoma now!

‌iPhone‌ widgets can be accessed on the Mac, too.

‌iPhone‌ just needs to be nearby or on the same Wi-Fi network. ‌Widgets‌ on the Mac are interactive now, too. Use your car widget from your ‌iPhone‌ to start cooling off your car.

macos sonoma

10:50

Kojima Games will release Death Stranding Director’s Cut game to Mac.

Kojima Games will release Death Stranding Director's Cut game to Mac.

10:55 am

Here are Audio & Home features.

apple home and audio

11:00 am

AirPlay in hotels is for using the hotel’s electronic devices easily.

11:05 am

‌watchOS 10‌ is alive! A new way to view information quickly from any watch face, plus comprehensive app redesigns across watchOS.

New Cycling support for Workout. Apple Watch can connect to Bluetooth-enabled bike sensors.

Now for the excited part for developers, Workout API. Developerss can create workout programs that can be accessible from the Workout app.

watchos details

11:20 am

The new AR platform Vision Pro is alive! It’s a headset, you look through, but not at. Digital content blended into the space around you.

Use eyes, hands and voice to control.

Vision Pro lets you never be separated from people around you. Vision pro displays your eyes when people are around. New “EyeSight” feature with an external display.

It can use Magic Trackpad and Magic Keyboard as control inputs, and even bring your Mac screen into Vision Pro.

It starts $3499.

Its operating system is called visionOS.

visionos details

11:40 am

Disney is celebrating its 100th anniversary.

Disney is celebrating its 100th anniversary.

That is all we gather from the WWDC 2023! For more detailed posts about the sessions, be sure you keep track our blog webpage or sign up for our newsletter from below.

What’s New in Swift 5.7, WWDC 22

Great new features await us with Swift 5.7. Some are enhancements to Swift, while others are enhancements and improvements to make it easier for us to write code.

In this article, we will examine the innovations that come with Swift 5.7 with examples.

Clock, Instant and Duration

Swift announces the innovations it offers to make time and duration management more stable in the SE-0329 section.

Clock

Clocks represent a way of measuring time passing. There are two built in: the continuous clock keeps incrementing time even when the system is asleep, and the suspending clock does not.

SuspendedClock

  • Measuring device time
  • Delays for animations

ContinuesClock

  • Measuring human time
  • Delays by an absolute duration
// Measure elapsed duration of work

let clock = SuspendingClock()
let elapsed = await clock.measure {
  await someLongRunningWork()
}

// Measure elapsed duration of work

let clock = ContinuousClock()
let elapsed = await clock.measure {
  await someLongRunningWork()
}

Instant

Instants represent an exact moment in time. Instants are there to be used to compare moments.

Duration

Duration can be used to represent the time elapsed between two Instant.

New “if-let” Unwrapping Syntax

With Swift 5.7, you will now be able to unwrap an optional value in a shorter way. This was announced in section SE-0345.

// Swift 5.6 and prior

let appCircle: AppCircle?

if let unwrappedAppCircle = appCircle {
    // `appCircle` is of type `AppCircle`
}

// Swift 5.7

let appCircle: AppCircle?

if let appCircle {
    // `appCircle` is of type `AppCircle`
}

Multi-statement closure parameter/result type inference

We no longer have to define result types when we use the closures we love to use. Swift will handle this for us. See SE-0326.

As you know before, we had to define these result types and the code we wrote was increasing.

let points = [25, 47, 12, 78, 90]

let results = points.map { point in
    if point >= 70 {
        return "\(point): Well done!"
    }
    
    return "\(point): Nice try! :("
}

/* Old way
let points = [25, 47, 12, 78, 90]

let result = points.map { point -> String in
    if point >= 70 {
        return "\(point): Well done!"
    }
    
    return "\(point): Nice try! :("
}

*/

Opaque Parameter Declarations

If you’ve ever been interested in SwiftUI, you’ve probably heard of the ‘some’ keyword. When we put this keyword in front of a parameter, the parameter becomes Opaque.

Well, if you say what will be the use of these Opaque type parameters, our code will be more readable and reduced when using Swift Generics with Opaque types. Additionally, we can use the ‘any’ keyword.

See SE-0341 and SE-0309
Some

  • Holds a fixed concrete type
  • Guarantees type relationship

Any

  • Holds an arbitrary concrete type
  • Erases type relationships
// `some`
protocol Animal {
  associatedtype Feed: AnimalFeed
  func eat(_ food: Feed)
}

struct Farm {
  func feed(_ animal: some Animal) {
    let crop = type(of: animal).Feed.grow()
  }
}

// `any`
let technologies: [any Equatable] = ["AppCircle", 10]

Regex

Regex operations are now easier with Swift 5.7. Prior to this we had to deal with Range and NSRegularExpression.

Now, thanks to Regex type, we will be able to do the regular expression operations we need more easily.

See SE-0350.

Regexes can be created at run time from a string containing familiar regex syntax. If no output type signature is specified, the regex has type Regex<AnyRegexOutput>, in which captures are existentials and the number of captures is queryable at run time. Alternatively, providing an output type signature produces strongly-typed outputs, where captures are concrete types embedded in a tuple, providing safety and enabling source tools such as code completion.

let pattern = #"(\w+)\s\s+(\S+)\s\s+((?:(?!\s\s).)*)\s\s+(.*)"#
let regex = try! Regex(pattern)
// regex: Regex<AnyRegexOutput>

let regex: Regex<(Substring, Substring, Substring, Substring, Substring)> =
  try! Regex(pattern)

By examining the code block below, you can better understand how we use the new regex type with a comparative example.

let text = "AppCircle is a great tool for CI/CD pipeline management."

// Old
print(text.ranges(of: "for"))
print(text.replacing("great", with: "excellent"))

// New
print(text.ranges(of: /[a-z]for/))
print(text.replacing(/[a-z]at/, with: "excellent"))

What is New in SwiftUI 4.0, WWDC 2022

WWDC 22 is passed so quick, isn’t it? SwiftUI is one of the most awaited subjects from developers in WWDC 22. Some of the developers are satisfied with the new features for SwiftUI, but some are not.

Here are the features that will be in SwiftUI 4.0, iOS 16.

Hide Home Button(Indicator)

Apple’s Documentation

Some screens are required a lot of taps and focus from the user. To achieve this goal, we can hide the bottom native indicator in SwiftUI not.

var body: some View {
    EmptyView()
        .persistentSystemOverlays(.hidden)
}

Hide Home Button(Indicator)

Navigation Stack

Apple’s Documentation

The new way to manage navigations instead of NavigationView.

With the new NavigationStack, we can define multiple destinations by the model.

let vehicles: [Vehicle] = [
    .init(name: "Car", iconName: "car"),
    .init(name: "Bus", iconName: "bus"),
    .init(name: "Airplane", iconName: "airplane")
]

var body: some View {
    NavigationStack {
        List(vehicles) { vehicle in
            NavigationLink(value: vehicle) {
                Label(vehicle.name, systemImage: vehicle.iconName)
            }
        }
        .navigationDestination(for: Vehicle.self) { vehicle in
            VehicleDetailView(vehicle: vehicle)
        }
    }
}

Navigation Stack

Half Sheet

It is one of the features developers mostly demand. Finally, Apple is making it public for us!

All we need to do is call the presentationDetents function of the view we will show as the half sheet.

The function takes detents as the parameter to set the height of the sheet. We can also set a constant height by typing .height(200).

@State var isPresentedHalfSheet: Bool = false

var body: some View {
    Button {
        self.isPresentedHalfSheet.toggle()
    } label: {
        Text("Present half sheet")
    }
    .sheet(isPresented: $isPresentedHalfSheet) {
        HalfSheetView()
            .presentationDetents([.medium, .large])
    }
}

Half Sheet

Swift Charts

Apple’s Documentation

There are different chart styles we can use in the library.

BarMark, LineMark, AreaMark, PointMark, RectangleMark, RuleMark.

Swift Charts

Here is an example of the bar chart.

let chartData: [KeyValue] = [
    .init(key: "A", value: 5),
    .init(key: "B", value: 10),
    .init(key: "C", value: 15)
]

var body: some View {
    Chart(chartData) {
        BarMark(x: .value("Key", $0.key),
                y: .value("Value", $0.value))
    }
}

Swift Charts

Multi Date Picker

Apple’s Documentation

The component provides to choose multi dates through the native date picker.

@State var selectedDates: Set<DateComponents> = []

var body: some View {
    MultiDatePicker("Dates", selection: $selectedDates)
}

Multi Date Picker

Custom Layout

Apple’s Documentation

In case the layout style has to be changed by the user’s interaction, AnyLayoutprovides to achieve it.

@State var changeLayout: Bool = false

var body: some View {
    let layout = changeLayout ? AnyLayout(HStack()) : AnyLayout(VStack())

    VStack {
        layout {
            Text("First")
            Text("Second")
        }

        Button {
            self.changeLayout.toggle()
        } label: {
            Text("Change Layout")
        }
    }
}

Custom Layout

Photos Picker

Apple’s Documentation

It is used to choose multiple photos in the album.

@State var selectedPhotos: [PhotosPickerItem] = []

var body: some View {
    PhotosPicker(selection: $selectedPhotos) {
        Text("Choose photos")
    }
}

Photos Picker

Shape Style Extensions

We can set foreground and background styles to views. These styles support set gradient colors and shadows.

var body: some View {
    VStack {
        VStack {
            Image(systemName: "person")
        }
        .background(in: Circle().inset(by: -20))
        .backgroundStyle(.orange.gradient)
        .foregroundStyle(.white.shadow(.drop(radius: 1)))

        VStack {
            Image(systemName: "house")
        }
        .background(in: RoundedRectangle(cornerRadius: 16).inset(by: -20))
        .backgroundStyle(.orange.gradient)
        .foregroundStyle(.white.shadow(.inner(radius: 1)))
    }
}

Shape Style Extensions

ViewThatFits

Apple’s Documentation

It decides which view will be fit to the screen and it will be the one only visible.

The longer text won’t fit in the portrait mode, therefore the shorter one will be visible. Since the longer one will be able to fit in the landscape mode, it will be visible.

var body: some View {
    ViewThatFits {
        Text("Hello, I am the longer text and most probably I will be visible only in the landscape mode")
            .frame(width: 700, height: 300)
        Text("Hello, I am the shorter text")
            .frame(width: 300, height: 100)
    }
}

ViewThatFits

Mixed-State Toggle

Apple’s Documentation

Sometimes we need a parent toggle states that are associated with its sub toggles. DisclosureGroup provides a structure for that.

@State var profileNotificationsIsOn: Bool = false
@State var campaignNotificationsIsOn: Bool = false
@State var emailNotificationsIsOn: Bool = false

var body: some View {
    DisclosureGroup {
        Toggle("Profile Notifications", isOn: $profileNotificationsIsOn)
        Toggle("Campaign Notifications", isOn: $campaignNotificationsIsOn)
        Toggle("E-Mail Notifications", isOn: $emailNotificationsIsOn)
    } label: {
        Toggle("Notifications", isOn: [
            $profileNotificationsIsOn,
            $campaignNotificationsIsOn,
            $emailNotificationsIsOn
        ])
    }
 }

Mixed-State Toggle

Multiline TextField

Apple’s Documentation

In SwiftUI 4, we are able to define specific ranges of a textfield’s line count. Something like, from 1 to 2, from 5 to endless.

@State var textFieldText: String = ""

var body: some View {
    TextField("I am just a text field", text: $textFieldText, axis: .vertical)
        .lineLimit(...2)
}

Multiline TextField

We’ve tried to list some of the major improvements announced for SwiftUI at WWDC 2022 this year. Of course that’s not all! We’re still digging through the documentation and will add more as we find new additions.

Stick around our blog to find more WWDC 2022 articles.

Modern Layout on UIKit with UICollectionView Compositional Layout

Creating collection views for iOS apps were pretty straightforward. A simple UICollectionFlowLayout would create flowing lists or grids of items. But things got a lot harder when the layout got a little more complex. A horizontal list within a vertical collection view required some extra tricks that every experienced iOS developer has inevitably used. Hopefully, at WWDC19, Apple introduced UICollectionView Compositional Layout, along with Diffable Data Sources. Now we can create nested layouts via and creating these layouts are quite easy.
We are going to look at these two new APIs today. First, we are going to create UICollectionView Compositional Layout object and then we’ll to feed the UICollectionView using UICollectionViewDiffableDataSource.

UICollectionView Compositional Layout

When we are creating new UICollectionViewCompositionalLayout we need three things; Section, Group and Item. Section is same as before but here we have actually new two things here, Group and Item. Think Group as another UICollectionView that has multiple UICollectionViewCell. Lastly, Item is a UICollectionViewCell. Sections has Groups and Groups has Items. See below figure for basic understanding.
Basic demonstration of Section, Group and Item inside UICollectionView Compositional Layout

Section and group

Let’s create our first and fresh layout. 
[gist id=”f10b1b48fa8d2ff69f7539b13ec29cb3″ /]
Above code snippet will produce below layout. Also at Line: 74, you will see orthogonalScrollingBehavior property is equal to .groupPaging. This property setup will make our layout scrollable by groups. 
Outer and inner group
Also we have other useful options for orthogonalScrollingBehavior. Let’s take a quick look of them.
Continuous
It removes pageable scroll behaviour and makes our group scrollable continuously.
ContinuousGroupLeadingBoundary
It behaves like both .groupPaging and .continues options. You can scroll the group continuously but when you stop scrolling your group will fit the screen like .groupPaging smoothly. 
None
The section does not allow users to scroll its content orthogonally. In our case, all the groups that we created will be layout vertically inside its own section. 
This is all about creating UICollectionViewCompositionalLayout. Simple is that! 
So what’s next? Without data a layout is nothing for us. For the next step we will create and implement our UICollectionViewDiffableDataSource. But first let’s look at what it is:

UICollectionViewDiffableDataSource

The classic and old way was using UICollectionViewDataSource. We were inheriting the protocol to our UIViewController and there were bunch of delegate methods for what cell to display, how many cells to display, which section to display the cells in, and so on.
The modern and new way is UICollectionViewDiffableDataSource and it removes most of the logical work and gives us convenience. It allows us to write simpler, clearer and error free code.
With this new approach we are just going to tell our modern data source to what Section and Item to display rather than the how many items to display.
The new diffable part is coming from that whenever you want to update your UICollectionView with new data source, the modern data source will calculate the differences between your old and new data and only will update different parts. This will reduce the amount of code you wrote and make your UICollectionView work high performance.
As I mentioned above we need to create Section and Item. Let’s create them and let me explain the details.
[gist id=”9d47e7aeafbe5ddec462d5bf63c23066″ /]
Why our Section and Item is implementing Hashable protocol? To determine the changes between old and new data. Hashable protocol makes this possible. Functions that we created in Section class are needed for hashing and checking if two Section are equal to each other. 
Now it’s time to create actual UICollectionViewDataSource’s itself. See code snippets below.

Generating new UICollectionViewDataSource

[gist id=”ab34372ecbd11fc25ee5187d0a981afe” /]

We defined two typealias for making our code more readable and clean. You can ask What is Snapshot anyway? NSDiffableDataSourceSnapshot is basically stores your Sections and Items. You can think of it as reference for your modern data source.
Also we must create a SupplementryView for our sections. It’s simple as above code snippets shows. 
Are we done yet? Nope. We need one last thing to implement. We must apply our Snapshot to our modern data source. How we are going to make it happen? See below code snippet.
[gist id=”2feb2068bfea865a6c7d1e1219e3075d” /]
We defined our sections as a class variable and using it applied our snapshot to data source. Every time you update your sections just call applySnapshot method and voila! you successfully updated your modern data source.

Summary

In this article you learned how to implement UICollectionViewCompositionalLayout and UICollectionViewDiffableDataSource to your new project as modern ways. You can challenge yourself with different types of layouts.

Where to Go From Here

You can check Apple’s official documentation: https://developer.apple.com/documentation/uikit/uicollectionviewcompositionallayout

Also you can watch WWDC19 video about Collection View Layouts: https://developer.apple.com/videos/play/wwdc2019/215/

Apple also has a Diffable Data Source video: https://developer.apple.com/videos/play/wwdc2019/220

Dynamic Localization in SwiftUI

We must have seen some cool apps that change the app language in real-time. Although Apple does not recommend it we sometimes need real-time localization to provide a better app environment. There are some ways to achieve that in UIKit but this article is only about SwiftUI.

TL;DR

By using Combine’s power, connect a localization manager to an environment object and localize texts via the localization manager.

Localization

Why we need real-time localization in SwiftUI?

Simple, we want cool apps! Besides the fancy reasons, asking Hey! Relaunch the app to see the language change please is kind of hard work for the user. We should always focus on the easiest usage of the app.

The Result

Localization result in mobile

Localization manager

The magic happens here:

[gist id=”ad2c575218a26493e5c1331b87bbc978″ /]

LocalizationManager must implement ObservableObject protocol to be observed from views.

language is the property to be observed hence it starts with Published property wrapper.

P.S. Published is one of the property wrappers in SwiftUI that allows us to trigger a view redraw whenever changes occur. More details

localize function takes the key as a parameter to look for its value. In a different way than the usual localization process, it checks if the project bundle has lprojfile which is related to the language.

P.S. Projects have localizable files as lproj formats. For the English language, it will be en.lproj.

Left Icon

Empower Your iOS Projects Now!

Right Icon Learn More

Accessing localization manager

Somehow we need to share and listen to the localization manager all over the app. Therefore, another property wrapper comes to help us, Environment Object.

P.S. Environment Object is an easy way to share data between views in SwiftUI. It also provides to update the view automatically when data changes. More details

[gist id=”86c4e7a316d81afc5094bb7407f2f52c” /]

We have AppEnvironment class which will be used as an environment object. Since it will be observed like localization manager, we are implementing ObservableObject again.

localizationManagerWillChange is a bridge to trigger localization manager’s objectWillChange property.

P.S. objectWillChange is the manuel way to update the data as Published property does it automatically.

View

We have a content view to simulate the process.

[gist id=”e26252614f9ba36700fb0c173e4574d5″ /]

At the 9. line we can see a localization process. We have a Localizable.string file that is localized in English and Turkish languages. Both files have the key as helloWorld.

On the screen, we also have 2 buttons to change the language dynamically. All we need to do is change language property in the language manager to change the language.

Usage of app environment

We initialize the app environment in the main app class.

[gist id=”444b32681e3f2ee006bcee1079c6dab4″ /]

And send to ContentView by using environmentObject.

Alternative scenarios

With the approach in this article, we can fetch/download localizable strings from remote and store in the localization manager. By using the localize function, we can look for the value of the related key.

In conclusion

Realtime localization is possible by using Combine’s powerful protocols and property wrappers. We need a localization manager class that will be observed. It must be connected to the environment object. These 2 components communicate with each other and adapt to the new language automatically.

Where to go from here

There are similar approaches to solve the same problem. I’ve listed two of them below:

Dynamic localization in SwiftUI with locale → https://kowei-chen.medium.com/swiftui-dynamic-localization-tricks-87c37a6db3e7

Dynamic localization in UIKit with lproj path → https://codewithbharathi.medium.com/localisation-in-ios-e88ef27b6faa

Mobile CI/CD Benchmark Report

As a mobile CI/CD platform, reducing build times is always a high priority. To improve our build times, last week, we’ve upgraded our iOS build infrastructure. Our machines are now dramatically faster, regardless of the project’s size and complexity. After upgrade, our instruments reported %50-70 reduction in build times. That’s 2-3x faster!

We’re really proud of our build times. But how does our new infrastructure compare to other mobile CI/CD platforms? We’ve tried it out.

How much faster than competition? (Bitrise, Codemagic, Appcenter)

We benchmarked a special Xcode project made for testing build times. We built 3 times, and took the average time. We also used the same Xcode version (13.1.1). Here are the results using their regular plans:

The platform that took the longest time was Microsoft’s App Center. 15.3 minutes.

The second longest was with Codemagic. 11.9 minutes.

The third was Bitrise. 9.9 minutes

And the platform with the best build times was Appcircle! 7.7 minutes.

Here are the full results. Our new infrastructure is 2x faster than Appcenter.

PlatformSeconds (lower is better)Minutes (lower is better)% Dif
Appcircle460.5587.675
Bitrise596.9709.94929.61
Codemagic716.37811.93955.54
 Appcenter 913.74515.22998.39

Of course, with these results, we can clearly call this out:

Fastest Mobile CI Platform is Appcircle

We’re delighted to have the fastest iOS build times. Our customers realized the difference before we even announced the upgrade. Helping mobile developers is why we do what we do. Thanks to all of our users for choosing Appcircle. Many more improvements are on the line!

Happy coding!

Sending Push Notifications On React Native Using Firebase

Sending Push Notifications to React Native Using Firebase

On any mobile app, sending push notifications is an important way to communicate with the users. Setting up a push notification system and distributing notification is a tedious process. Services like Google’s Firebase aims to make this process easy. Let’s look at how we can integrate Firebase into a React Native app.

First, let’s create a project and run it:

npx react-native init SampleRNPushNotifications --template react-native-template-typescript
cd SampleRNPushNotifications
yarn ios

Then, download the necessary libraries:

yarn add react-native-push-notification 
@react-native-firebase/[email protected] 
@react-native-community/push-notification-ios 
@types/react-native-push-notification

To clarify what each library does:

  • React-native-push-notification: Necessary to send local notifications
  • @react-native-firebase/app@11.2.0: Main library required to use Firebase services
  • @react-native-firebase/messaging@11.2.0: Required to use Firebase Cloud Messaging (FCM)
  • @react-native-community/push-notification-ios: Required to get notification permissions in iOS
  • @types/react-native-push-notification: Contains type definitions for Push Notifications

Next step is to download and install Cocoapods for iOS dependencies:

npx pod-install

Now it’s time to create a new Firebase project:

Creating a Firebase Project

Go to console.firebase.google.com, and create a project:


Choose a name for your project. I chose SampleRNPushNotification:


There will be an option to choose whether you’ll use Firebase analytics tools. Select enable and continue:


Now select a Google Analytics account:

When your project is created, you will be informed with the message ‘’Your project is ready’’:

Creating Push Notifications for Android

From the left sidebar, select the gear icon next to Project Overview and then select Project Settings:

Scroll down to Your apps section and select the Android button:

Step 1. On the Register App section, enter the package name of your Android app. Find the package name by opening Android Studio, navigating to build.gradle (Module: app) file. It’s under the defaultConfig section, with the applicationId key:

cat android/app/build.gradle |pcregrep -o1 "applicationId \"(.+)\""

App nickname field is a given name for your app on Firebase console.

For Debug signing certificate field, you can get the SHA1 code by entering following command to the command line:

keytool -list -v -keystore ./android/app/debug.keystore -storepass android |pcregrep -o1 "SHA1: (.+)"

Step 2. Download config file will give you a Firebase configuration file. Drag the file on top of app folder on Android Studio. To open your project in Android Studio, enter the following command on your command line (Mac):

open -a /Applications/Android\ Studio.app ./android

Step 3. Add Firebase SDK step is where we need to add Google Analytics dependency to our Android app. Here’s how you can do it:

dependencies {
  classpath("com.android.tools.build:gradle:4.1.0") 
  classpath 'com.google.gms:google-services:4.3.5' 
  // NOTE: Do not place your application dependencies here, 
  // they belong in the individual module build.gradle files 
}

At the very bottom of the app/build.gradle file, add google services plugin:

apply plugin: "com.google.gms.google-services"

Afterwards, on the same file, under dependencies there will be lines that start with implementation. Add firebase analytics libraries under the last implementation statement there:

implementation platform('com.google.firebase:firebase-bom:27.0.0')
implementation 'com.google.firebase:firebase-analytics'

After all is complete, you’ll see a Sync Now button on Android Studio. Click it and synchronize the project with gradle.

Step 4. Run your app to verify installation so that Firebase Analytics is set up properly. Run it using the command and make the “Congratulations” part active on Firebase Console:

yarn run android

Configuring Firebase on React Native App

To get the device’s token, let’s open the App.tsx file and make the following changes:

import React, {useEffect} from 'react'; 
import firebase from '@react-native-firebase/app'; 
import messaging from '@react-native-firebase/messaging'; 
const App = () => { 
    useEffect(() => { 
        messaging().getToken(firebase.app().options.messagingSenderId) 
        .then(x => console.log(x)) 
        .catch(e => console.log(e)); 
    }, []); 
    return <></>; 
}; 

export default App;

Then, run the project:

yarn android

When the project starts running, you’ll see the device’s token on the Metro Bundler terminal:

Note: We’ll use this token to send test notifications to our device.

To display the notification on screen while the app is open, update App.tsx file as follows:

import React, {useEffect} from 'react'; 
import firebase from '@react-native-firebase/app'; 
import '@react-native-firebase/messaging'; 
import PushNotification from 'react-native-push-notification'; 
import {Platform} from 'react-native'; 
import PushNotificationIOS from '@react-native-community/push-notification-ios'; 
import {FirebaseMessagingTypes} from '@react-native-firebase/messaging'; 

const App = () => { 
    useEffect(() => { 
        firebase.messaging().onMessage(response => { 
            console.log(JSON.stringify(response));
            if (Platform.OS !== 'ios') { 
                showNotification(response.notification!); 
                return; 
            } 
            PushNotificationIOS.requestPermissions().then(() => 
                showNotification(response.notification!), 
            ); 
        }); 
    }, 
    []
    ); 
    const showNotification = ( notification: FirebaseMessagingTypes.Notification, ) => { 
        PushNotification.localNotification({ title: notification.title, message: notification.body!, }); 
    }; 
    return <></>; 
}; 

export default App;

All done! Now let’s navigate to Firebase console to test whether sending notifications work. Select Cloud Messaging under Grow section on the left. Then, select Send your first message button.

1. Under Notification section, fill in the content for your notification. To add images to your notification, you must be on a paid plan on Firebase. You can get the test image from unsplash.

2. Select Send test message. Then on the next field, you can enter the device token you got from the last section to send a test notification:

Make sure the app ran at least once on your device before sending. Do all the adjustments and tap Review. Verify the content and tap Publish. After sending, you’ll see the notification like this:

Creating Firebase Push Notifications on iOS

Open the iOS project in Xcode:

open ios/SampleRNPushNotifications.xcworkspace

Navigate to Firebase console, and add an iOS app:

Follow the steps there afterwards.

Step 1. Register app: First, you need to find your app’s bundle identifier. It can be found from Xcode:


Step 2. Download config file: Download the plist file and drag it into SampleRNPushNotifications folder. Pick all 4 targets on the panel that follows:


Step 3. Add firebase SDK: All you need to do is to add the following line to your Podfile file (not Podfile.lock):

pod 'Firebase/Analytics'

then run Cocoapods:

pod install --project-directory=ios/

Step 4. Add initialization code: Go to AppDelegate.m file and import Firebase to the bottom of the imports:

@import Firebase;

then find the didFinishLaunchingWithOptions method and inside call initialize on Firebase:

[FIRApp configure];

Step 5. Run your app to verify installation: Run the app and see whether everything works:

npx react-native run-ios

Making changes to React Native App

If you’re using the iOS simulator to test, you might see a warning like the one below.

Apple now allows to test push notifications on the iOS simulators. For a detailed guide, check out SwiftLee’s article.

Make modifications to App.tsx file to make it work on iOS. This is the final file:

import React, {useEffect} from 'react'; 
import firebase from '@react-native-firebase/app'; 
import '@react-native-firebase/messaging'; 
import PushNotification from 'react-native-push-notification'; 
import {Platform} from 'react-native'; 
import {FirebaseMessagingTypes} from '@react-native-firebase/messaging'; 
import PushNotificationIOS from '@react-native-community/push-notification-ios'; 

const App = () => { 
    const getToken = () => { 
        firebase .messaging() 
        .getToken(firebase.app().options.messagingSenderId) 
        .then(x => console.log(x)) 
        .catch(e => console.log(e)); 
    }; 
    const registerForRemoteMessages = () => { 
        firebase 
        .messaging() 
        .registerDeviceForRemoteMessages() 
        .then(() => { 
            console.log('Registered'); 
            requestPermissions(); 
        }) 
        .catch(e => console.log(e)); 
    }; 
    const requestPermissions = () => { 
        firebase 
        .messaging() 
        .requestPermission() 
        .then((status: FirebaseMessagingTypes.AuthorizationStatus) => { 
            if (status === 1) { 
                console.log('Authorized'); 
                onMessage(); 
            } else { 
                console.log('Not authorized'); 
            } 
        }) 
        .catch(e => console.log(e)); 
    }; 
    const onMessage = () => { 
        firebase.messaging()
        .onMessage(response => { 
            showNotification(response.data!.notification); 
        }); 
    }; 
    const showNotification = (notification: any) => { 
        console.log('Showing notification'); 
        console.log(JSON.stringify(notification)); 
        PushNotification.localNotification({ 
            title: notification.title, message: notification.body!, 
        }); 
    }; 
    getToken(); 
    if (Platform.OS === 'ios') { 
        registerForRemoteMessages(); 
    } else { 
        onMessage(); 
    } 
    return <></>; 
}; 

export default App;

Where to Go From Here?

Sending push notifications gets easy with rnfirebase plugin. With a few minutes of configuration and little code, we’ve implemented the ability to send push notifications to our React Native app via Firebase.

You can check https://github.com/mikehardy/rnfbdemo project to create boilerplate React Native apps with Firebase. All you need to do is to create a new app on Firebase for ‘com.rnfbdemo’ and add GoogleServices-Info.plist and json files into the project. The rest is handled by make-demo.sh file.

You can find the final project we’ve built here at react-native-push-notification-firebase repo.

Use Appcircle to build, test and distribute your React Native apps. From creating an account to starting your first build takes less than 30 seconds. Start for free.

Happy coding!

12 Essential Desktop Apps for iOS Developers Header

12 Essential Desktop Apps for iOS Developers

For developers, using only the Code Editor or IDE to develop applications isn’t enough. While IDEs have many features to improve developer workflow, different apps focused on a single task does the job better. Here are 12 essential desktop apps we use and recommend for iOS developers:

Version Control

Tower ($69-99/year) macOS/Windows

Website

For those who prefer GUIs over CLI’s, Tower is a Git client that has all the functions Git has, and does it in a very simplified way. Adding remotes, managing branches and harder stuff like rebasing can be done via buttons and dragging/dropping. It can setup git-flow branching system, and has Gerrit support. You can choose which diffing tool you want to use to resolve conflicts. macOS version is going a little ahead of the Windows version, but both are very good.

File Diffing & Merging

Kaleidoscope ($69.99) macOS

Website

There is always the free FileMerge bundled with macOS, but it’s UI is old and non-ascii files and non-text formats are not supported. Kaleidoscope has a nice UI, and it can compare images, files and folders. It has built in support for Git, SVN and Mercurial as well. There’s also an iPad version, which is sold for $19.99.

Documentation

Dash ($29.99) macOS

Website

Developers spend a good chunk of their time reading documentation. Dash collects documentation from hundreds of programming languages and frameworks. You can navigate among them and it has good fuzzy search. It also integrates with most of the IDEs and automation software.

Dash for macOS

A Companion for SwiftUI ($49.99) macOS

Website

Apple’s SwiftUI documentation is lacking depth and some modifiers don’t have an overview. A Companion is SwiftUI is an app that lists all SwiftUI Types, Protocols and Methods with clear examples and explanation on how they work. You can also preview some of the types if they are also available on the Mac.

For a list of new things added to SwiftUI with iOS 15, check out our Major iOS 15 API Changes for Developers article.

A Companion for SwiftUI

View Debugging

Reveal ($59-119) macOS

Website

Reveal is a view debugging tool for UIKit apps. It’s much like the Web Inspector in browsers. You can see the entire view hierarchy in 2D or 3D, and filter views based on their memory address. You can inspect every view and its underlying CALayer, and updating a value from the inspector updates the app being debugged. It also inspects Auto Layout constraints and they can be altered as well. Reveal saved us many hours debugging UIs.

Reveal for macOS

Regular Expressions

Patterns ($2.99) macOS

Website

Patterns is an app to test and write Regular Expressions. It also exports code in a selected programming language

Patterns for Mac

Push Notification

Knuff  (Free, Open Source)

GitHub

Knuff is an app to test push notifications. You can provide a JSON payload and select a certificate. Then given a device token, you can send notifications instantly. It also has an iOS app.

Knuff for macOS

HTTP Client

Paw ($49.99) macOS

Website

If you’re making an app that communicates with a server API, then Paw is highly recommended. You can add all the requests and Paw will send them and display responses. It exports code to a variety of networking libraries. You can also create variables from response values. It supports multiple server environments. You can import Postman files too.

Paw Client for Mac

Visuals

Codye (Free, with Pro version $8.99) macOS

Website

With Codye, you can generate screenshots for code snippets in an elegant way.

Codye UI Mac

PaintCode ($199/year) macOS

Website

If you want to draw all visuals, iconography with code, PaintCode is a must. You can import vector graphics or draw your own and PaintCode gives you the UIBezierPath / CoreGraphics code. You can also parameterize certain values and they become configurable in your app.

PaintCode 3

ColorSnapper 2 ($14.99) macOS

Website

ColorSnapper is a color picker that can convert colors to values in code. You can easily get Swift/Obj-C UIColor/NSColor values from a color you picked. It also supports advanced settings to match copied value to match your code style.

ColorSnapper 2 Mac

Disk

DevCleaner for Xcode (Free)

Website

While developing in Xcode, the Developer folders increase in size over time. DevCleaner is a free tool that cleans your Xcode artifacts, such as DerivedData, iOS Images, Simulators, and more… You can pick what to delete and it supports multiple Xcode installations.

DevCleaner for Xcode

We’ve tried to list all the desktop apps we use frequently while developing iOS apps. If you’ve found this article useful, feel free to share this with others.


Major iOS15 API Changes for Developers

Major iOS 15 API Changes for Developers

Every year after WWDC, developers who make apps for iOS start working on all the changes and add new features. With next release coming in Autumn/Fall of 2021, we’ve put up a comprehensive list of developer-facing iOS 15 API changes for developers.

Brand New APIs

Apple introduced a few brand new user-centric features for iOS 15, which was also the highlight of the WWDC21 keynote.
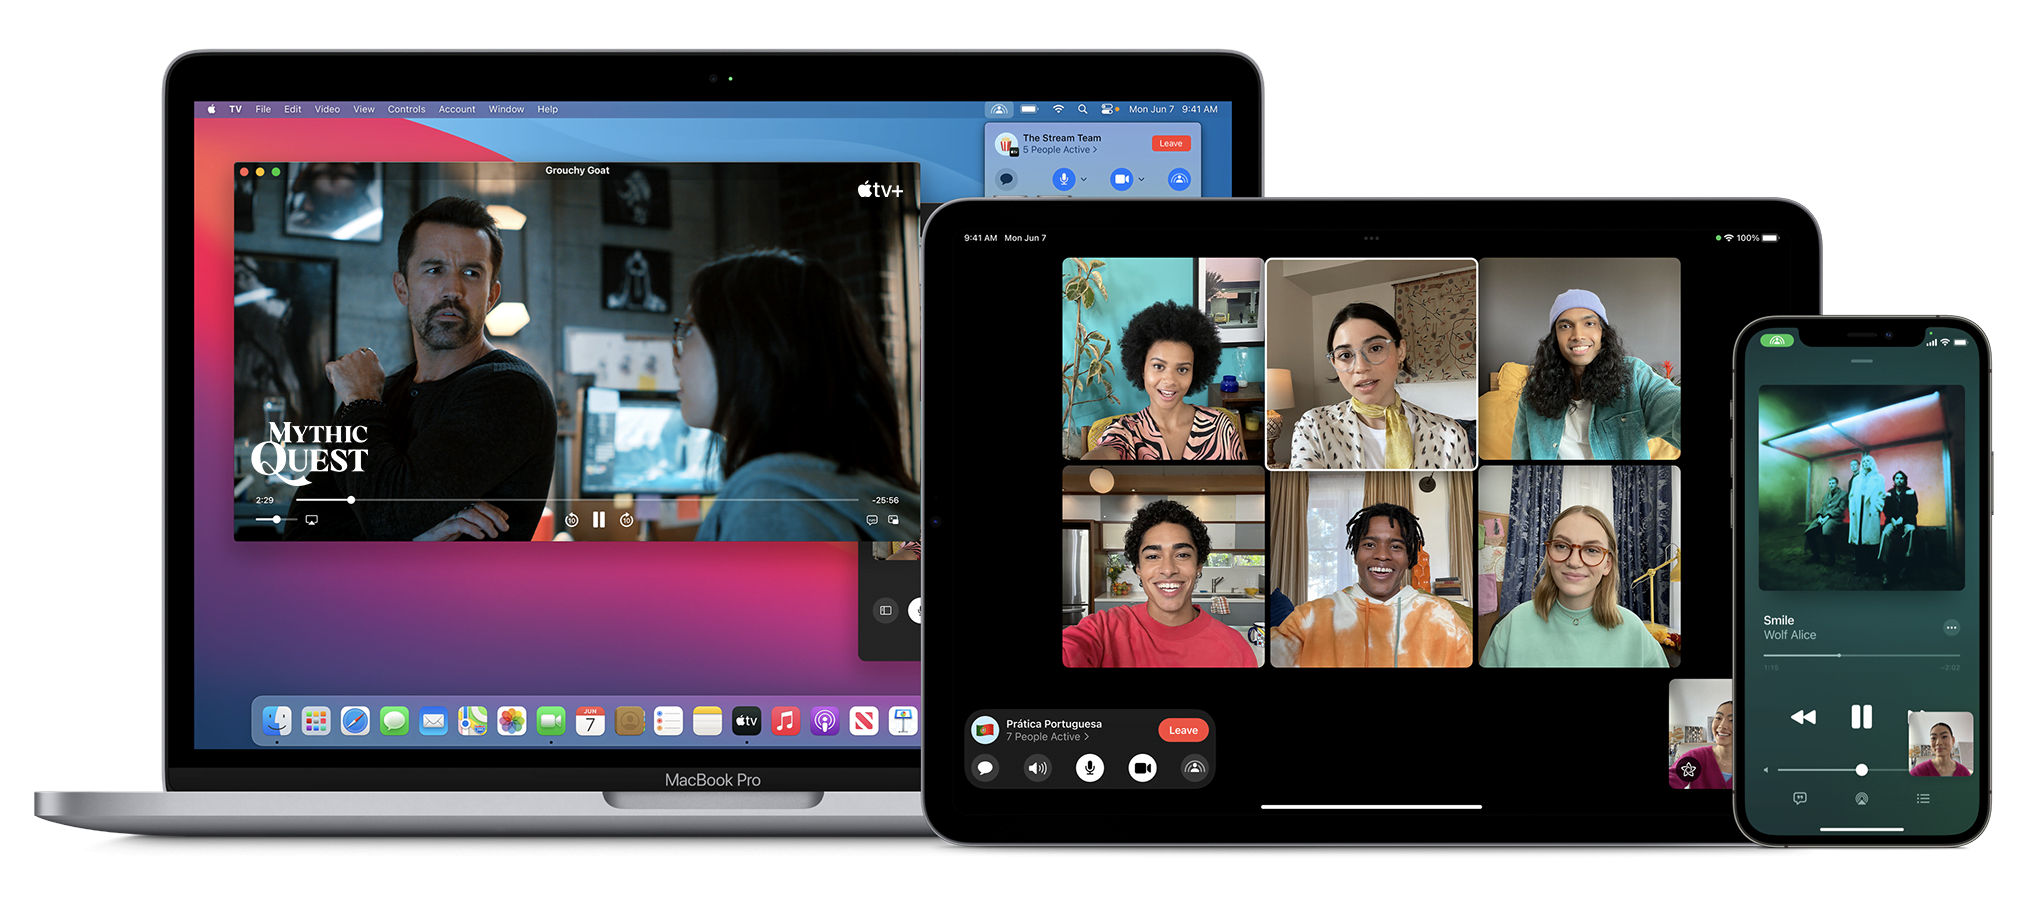
SharePlay

With SharePlay, your app’s features can be shared through FaceTime calls. If you have a media streaming app, you can use SharePlay APIs to let users watch or listen to media simultaneously. If your app is using AVFoundation to display content, then most of the work will be handled automatically. All you have to do is to use the new Group Activities API (https://developer.apple.com/documentation/GroupActivities) to provide that your app supports SharePlay and details about your content.

shareplay image

Note: Apple recently released a statement that SharePlay feature won’t be available on the initial release of iOS 15. It’ll be added via an update later this fall. More information here: https://developer.apple.com/news/?id=mxaeu6er

Focus Mode

Prior to iOS 15, users had the option to turn on Do Not Disturb mode to eliminate distraction from notifications and calls. iOS 15 adds the option to create different Focus Modes. Every mode can have their own list of allowed apps and contact list. Modes can be activated via a location change (arriving at the office), a time schedule, or when an app launches (when I launch Mail or Xcode).

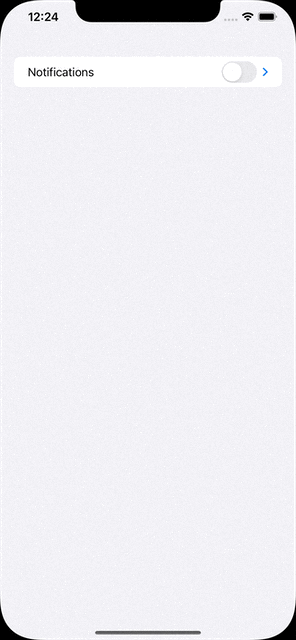
In support of focus modes, Apple also introduced notification importance levels. With it, the system can determine whether to display a very important notification, breaking the rules of Focus mode, or not display a trivial notification until focus mode ends. Your app needs to categorize the notification types.

To see the types and how to configure, check the Notifications segment in Human Interface Guidelines: https://developer.apple.com/design/human-interface-guidelines/ios/system-capabilities/notifications

App Store Changes

App Store is getting new capabilities that will help you marketing your app. You can now create versions of your product detail pages and target them to different segments of potential users. If you have special events for a time period, App Store can display these events on the home page.

App Store

StoreKit API got a major new version as well. With StoreKit 2, Apple has simplified the use of StoreKit, implementing modern Swift features.

There is a new App Store Server REST API as well. Developers can query subscription statuses, get in-app purchase history of a user, and can send usage data to Apple in case the user asks for a refund.

Later this year, apps can extend the subscription’s deadline up to 90 days due to an error in their content delivery. Ability to look up a user’s refund history and retrieve invoices from an order id is also coming later this year. More information on the server API here: https://developer.apple.com/documentation/appstoreserverapi

Apple’s beta distribution platform, Testflight can distribute Mac apps now. It only works for macOS 12 (Monterey) apps though.

ScreenTime API

With the ScreenTime API, apps can apply parental controls based on the app’s usage via the ScreenTime API.

More on ScreenTime API here: https://developer.apple.com/videos/play/wwdc2021/10123/

ShazamKit

Now developers can use Shazam’s audio recognition capabilities in their own apps.

More on ShazamKit here: https://developer.apple.com/shazamkit/

Nearby Interaction API

If you’re making an accessory that communicates with an Apple Device that has a U1 chip, you can use the Nearby Interaction API to make UWB (Ultra Wideband) communication between the device and your app. Apple uses this API to help users locate AirTags.

More on Nearby Interaction API here: https://developer.apple.com/nearby-interaction/

Object Capture

Added with RealityKit 2, Object Capture turns your Apple device into a 3D scanner. By taking multiple images of a real-world object, the object is turned into a detailed 3D model you can use and distribute.

More on Object Capture here: https://developer.apple.com/augmented-reality/object-capture/

Swift

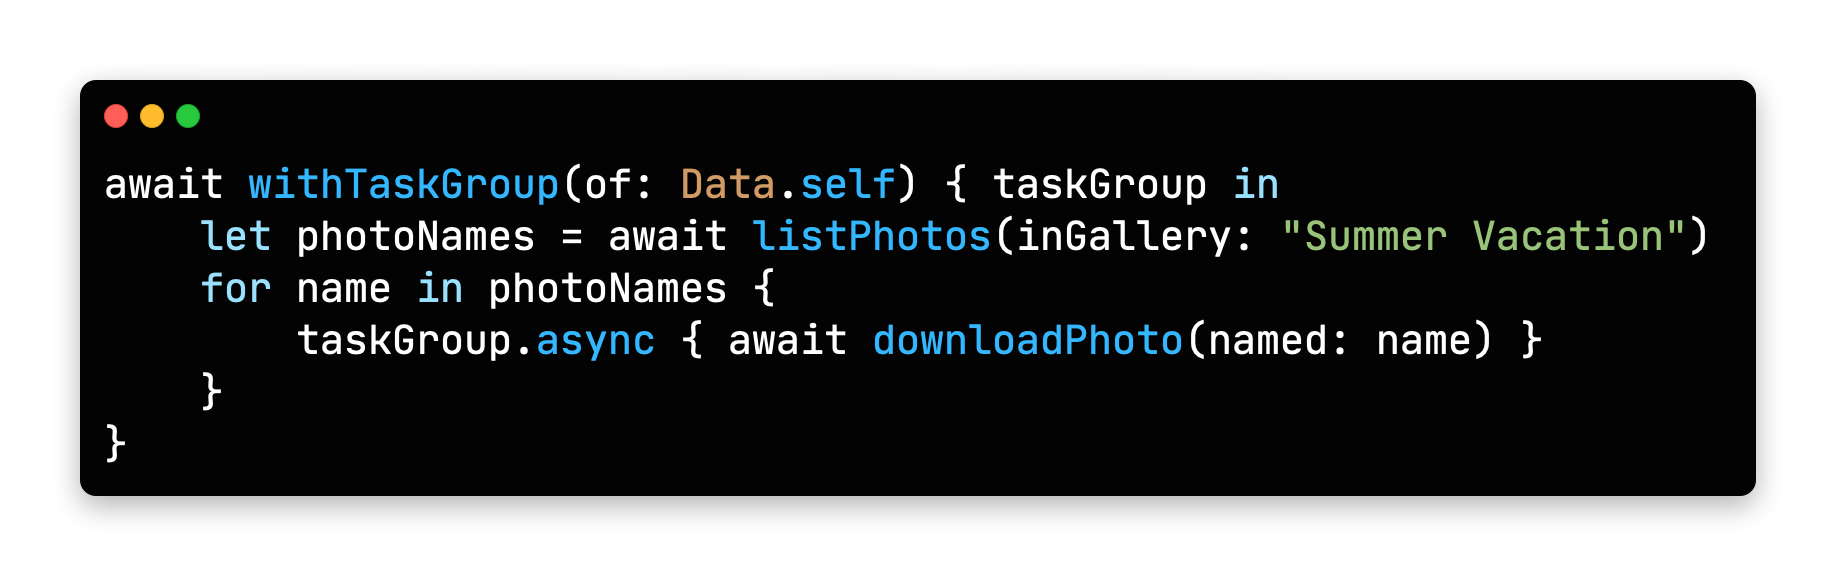
Swift Programming Language is getting lots of new features this year. Main focus during WWDC21 was on Concurrency. With it, Swift gets the async/await syntax to handle asynchronous code. All async functions inside iOS SDK is also updated for this new syntax.

Concurrency in Swift Example COde

Unfortunately, Apple acknowledged that concurrency features will not be backwards compatible, meaning it will only run on iOS 15 and above. But there is always hope: https://github.com/apple/swift/pull/39051

Conversion between CGFloat and Double

Starting with Swift 5.5, the compiler can convert Double values to CGFloat and vice versa, which previously required explicit type declaration.
https://github.com/apple/swift-evolution/blob/main/proposals/0307-allow-interchangeable-use-of-double-cgfloat-types.md

Other Swift 5.5 Additions

There are other Swift improvements like local lazy variables, Swift package collections, and Codable support to enum cases with associated values, and more.

Check the WWDC session video for a deeper dive at what’s added: https://developer.apple.com/videos/play/wwdc2021/10192/

SwiftUI

Apple’s new declarative UI framework, SwiftUI is getting developers excited for new additions every WWDC. Here are some of the SwiftUI changes in iOS 15:

AsyncImage

SwiftUI now has a view type that can load images asynchronously.

https://developer.apple.com/documentation/swiftui/asyncimage/

Refreshable

Any View can have pull-to-refresh functionality, and List views get UI handling automatically.
https://developer.apple.com/documentation/swiftui/label/refreshable(action:)

Animation modifier change

.animation() modifier caused glitches when a value that’s not associated with the animation was updated, or any time a system-wide animation is triggered (like rotating the phone to landscape). New .animation(_ value:) modifier changes that. It triggers the animation when only passed binding value updates.

Search bars

search bars

Any view inside a NavigationView can use .searchable() modifier, which adds a search bar to the top of the view and calls a closure whenever the search query changes. Listening to changes can be disabled and search closure gets called when user taps a button. You can even add search suggestions.
More on search here: https://developer.apple.com/videos/play/wwdc2021/10176/

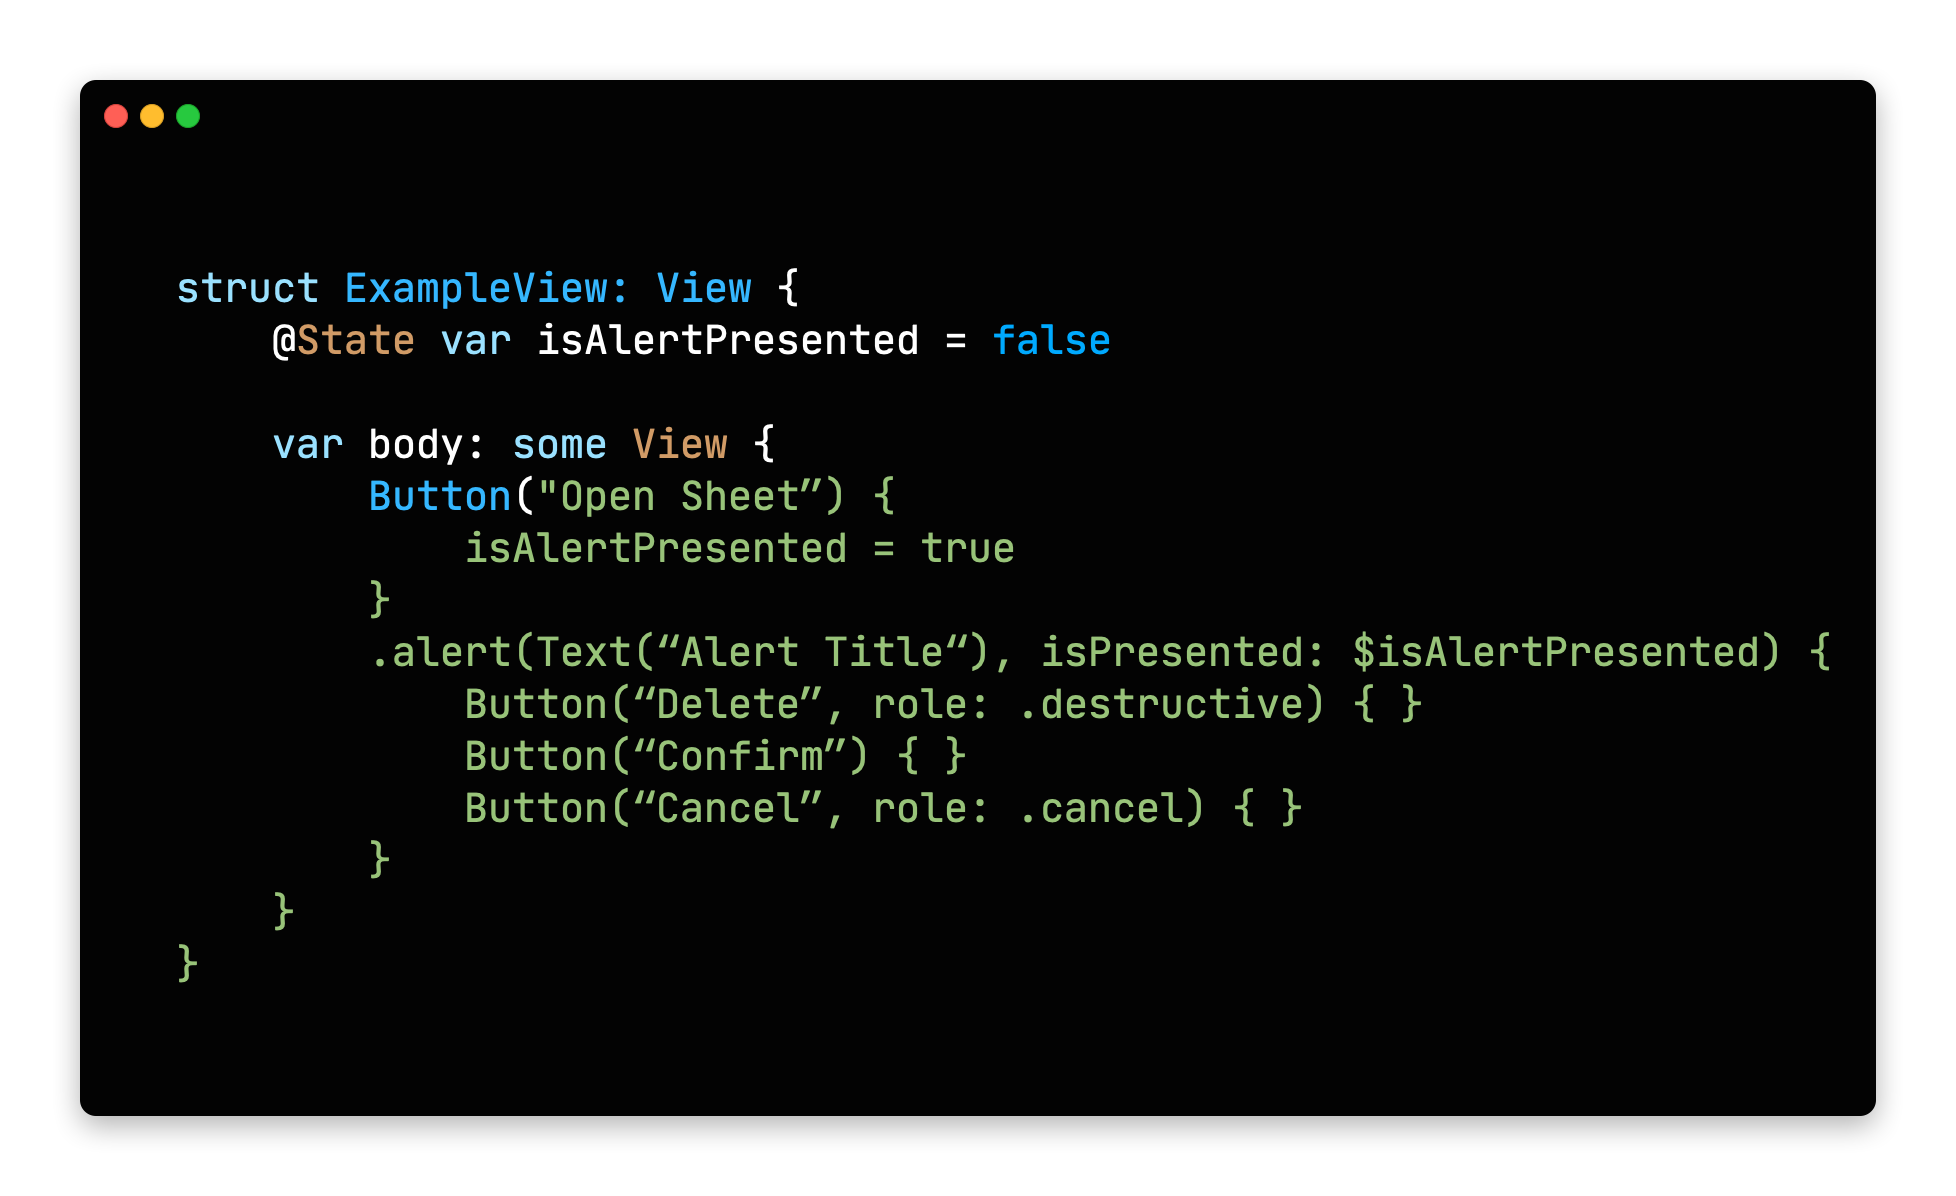
Changes to Alert and ActionSheet syntax

Previously, alert modifiers required to explicitly create actions inside an alert, the alert itself and finally return the alert. New syntax lets developers define buttons with roles and that’s it.
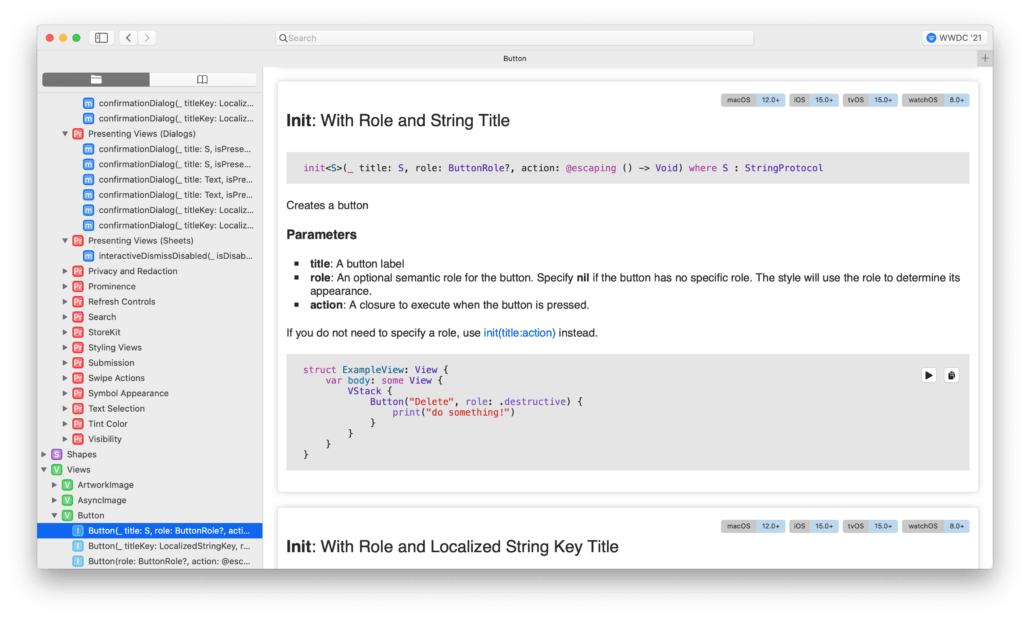
action sheet in swift ui

Buttons with roles

SwiftUI’s Button type initializer now can take a ButtonRole object. The predefined values for ButtonRole is the same as the ActionSheet actions: destructive, cancel and default(pass nil to make a button default)
https://developer.apple.com/documentation/swiftui/buttonrole/

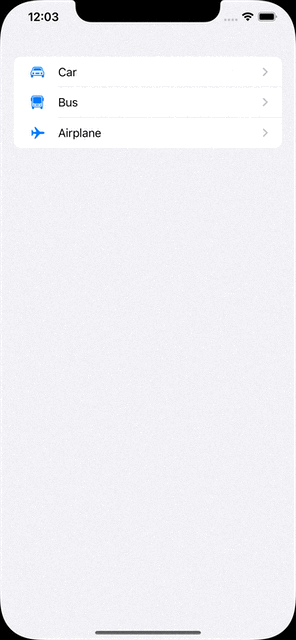
Updates to List (list element bindings, individual separator insets, custom swipe actions)

We knew that SwiftUI’s List view was using UITableView in the background, but it missed UITableView’s customization and flexibility. With the next release, SwiftUI adds bindings to list elements individually, separator insets can be configured on cell level and custom swipe actions can now be added.
https://developer.apple.com/documentation/swiftui/list/

.task()

Previously, we used .onAppear() modifier to load async content after a view got displayed. Now there is a more safe .task() modifier to run async tasks after a view is rendered initially.

For more in depth information and other improvements, check out WWDC’s What’s New in SwiftUI session: https://developer.apple.com/videos/play/wwdc2021/10018/

We also suggest all SwiftUI developers to watch “Demystify SwiftUI” talk as well: https://developer.apple.com/videos/play/wwdc2021/10022/

Xcode

Xcode 13 also got many improvements this year.

Custom documentation with DocC

Xcode now takes markdown comments and inline documentation and displays them with Apple’s own documentation style. DDoC format can also be used outside Xcode, but it’s not widely supported yet.

Better version control

Apple added support for Code Reviews and Pull Requests. Version control tab also got many small improvements.

Vim Mode

For those who are used to Vim’s commands, Xcode now has a Vim Mode that maps all vim keyboard commands to Xcode. To enable select Editor -> Vim Mode.

Better code completion

Xcode now auto fills when you are unwrapping an optional with if-let, and switch cases gets auto-filled as well.

Foundation and UIKit

New Swift AttributedString Type

Swift now has its own AttributedString type. Create an AttributeContainer value to style chunks of text.

It also has built-in markdown support. All SwiftUI Text types are also accepting AttributedString values.
https://developer.apple.com/documentation/foundation/attributedstring

Date() -> Date.now

Date class now has a direct property to get the current date and time. A nice to have addition.
https://developer.apple.com/documentation/foundation/date/3766590-now/

Changes to UIWindow key window behavior

If your app is using multiple windows and calling making them key window, the behavior is changing in iOS 15:

Improvements to UICollectionView and UITableView Cell Prefetching and Reloads

UIKit team also made improvements to the way cells are prefetched in a UITableView and UICollectionView. This brings a large performance benefit.

They also added the reconfigure method, which lets you directly update a certain cell, instead of reloading the entire table view. More info on both is here:
https://developer.apple.com/videos/play/wwdc2021/10252/

UIButton Configuration

New UIButton Styling

UIButton class got more customizable thanks to the UIButton.Configuration object. Title, subtitle, image setup, paddings between items, background/foreground color and many more options are available. You can define these styles or override the predefined styles to fit your app’s design system.
https://developer.apple.com/documentation/uikit/uibutton/configuration
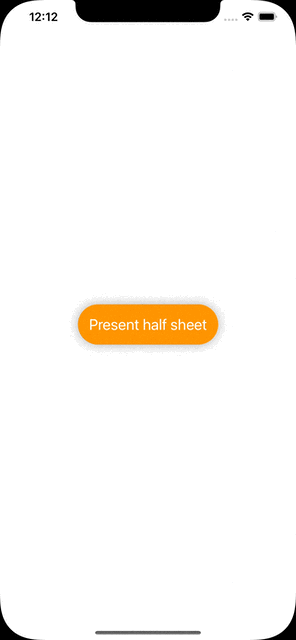
Bottom Sheets

UIKit has support for bottom drawer sheets in iOS 15. UISheetPresentationController class lets you present smaller-than fullscreen sheets inside your app. Sheets can determine their height by using detents. Detents are height breakpoints that the sheet can grow/shrink to.

More information here:
https://developer.apple.com/videos/play/wwdc2021/10063/
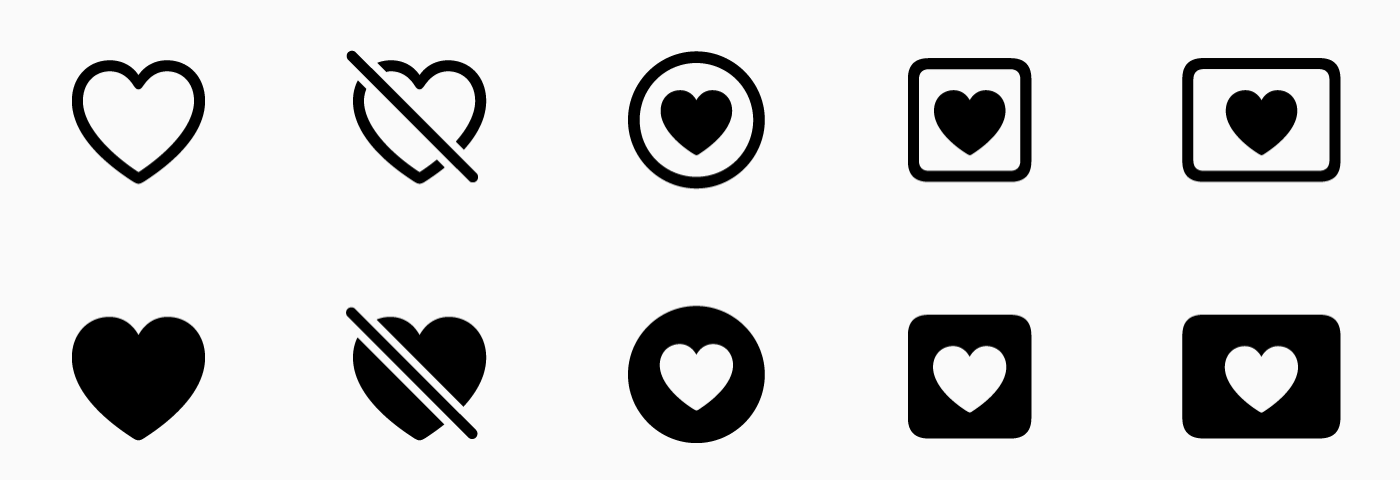
SF Symbols

Apple’s Design team makes new additions every year to help designers and developers to make better functioning apps. SF Symbols was a step in this direction. This year, SF Symbols got a lot more new symbols and more features.

Symbol Variants

Apple grouped symbols into variants. A symbol can have a regular, slashed, enclosed and other versions within the same group.

Variants in SF Symbols 3

There are also variants for icons for different languages and writing styles.
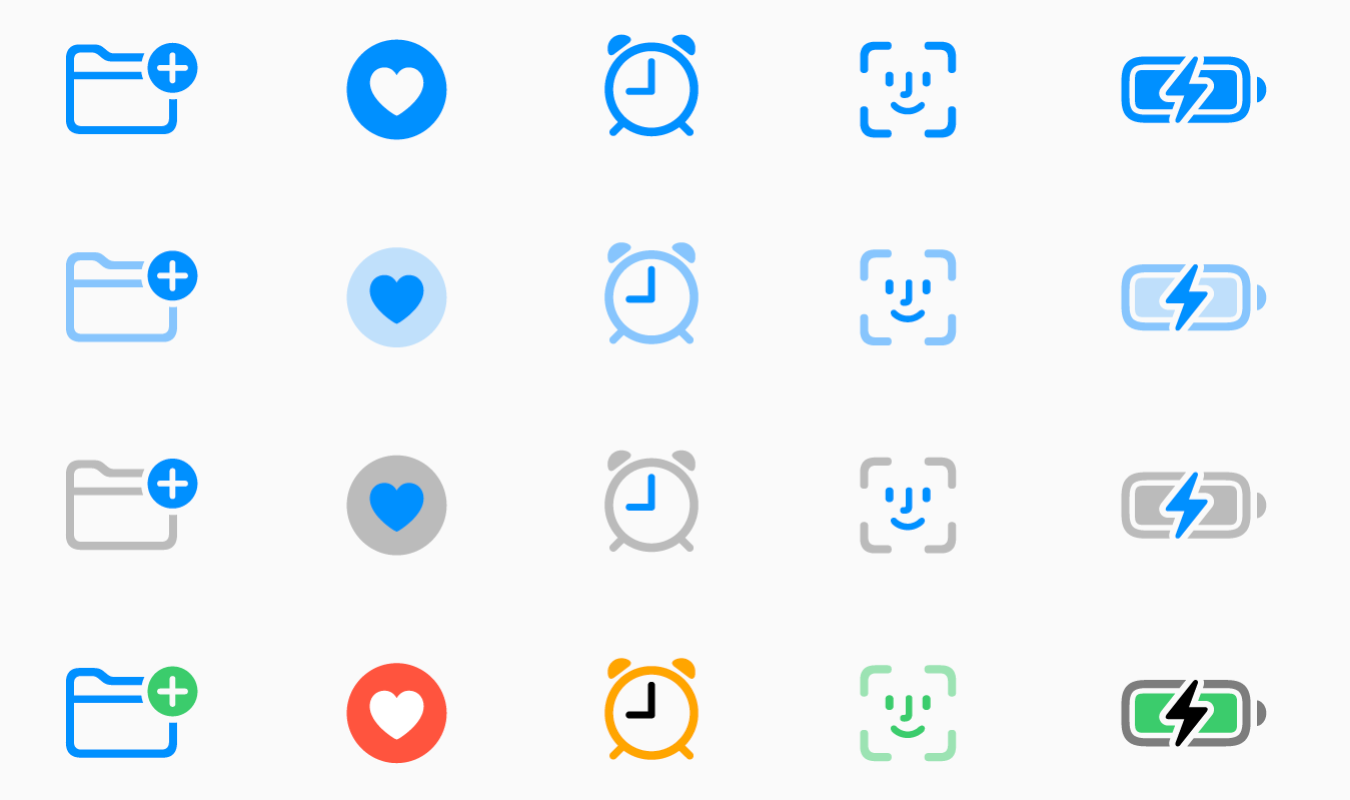
Localized variants for sf symbols

Symbol Colors

Now designers can pick between different styles of the symbols. Previously we had monochrome and multicolor variants. Now there are 2 new styles: Hierarchical and Palette. You can pick a single base color for hierarchical style or two colors for palette to modify icons based on your app’s color palette.

Symbol Colors

Custom Symbols

Now designers can also add their own custom symbols to sf symbols. Developers than can import them to their project and all the benefits of the SF Symbols arrive with them.

For all the new additions to SF Symbols check the WWDC talk: https://developer.apple.com/videos/play/wwdc2021/10097/

SF Arabic

San Francisco is Apple’s official font for all their products. This year, they added an Arabic version of the San Francisco font, called SF Arabic. You can download SF Arabic and all other Apple fonts here: https://developer.apple.com/fonts/

There are many other additions, changes and improvements on iOS 15, and listing all of them here would be impossible. We’ve tried to list major developer-facing iOS 15 API changes for developers.

To try out and use all the new additions, you need to use Xcode 13. As Appcircle, we support building with Xcode 13. And every new beta is available within 24 hours after its release. You can start using Appcircle for free.